Converting AI Illustrations to Manga BW with Screentone Instead of Grayscale
 Contents
I want to convert color anime-style AI illustrations into something that looks like manga manuscript monochrome.
A simple desaturation filter wraps it up in one shot, but that’s not manga. To pass as a manga page, the skin needs to drop to white, hair and clothing dark areas need to be replaced with solid black or screentone, and shadows have to be expressed via halftone dots, hatching, or cross-hatching.
I’ve been poking at this on local ComfyUI on M1 Max for a while, so this is a record of where the failure modes shake out at the current stage.
Major precondition: I want at most 2-3 minutes per image. “It comes out clean if you run it for several hours” doesn’t qualify as practical, so during verification, the moment a single image takes long enough that I get tired of waiting, that candidate is cut early. Quality and speed aren’t a tradeoff — when speed doesn’t hold, the candidate falls before quality is even discussed.
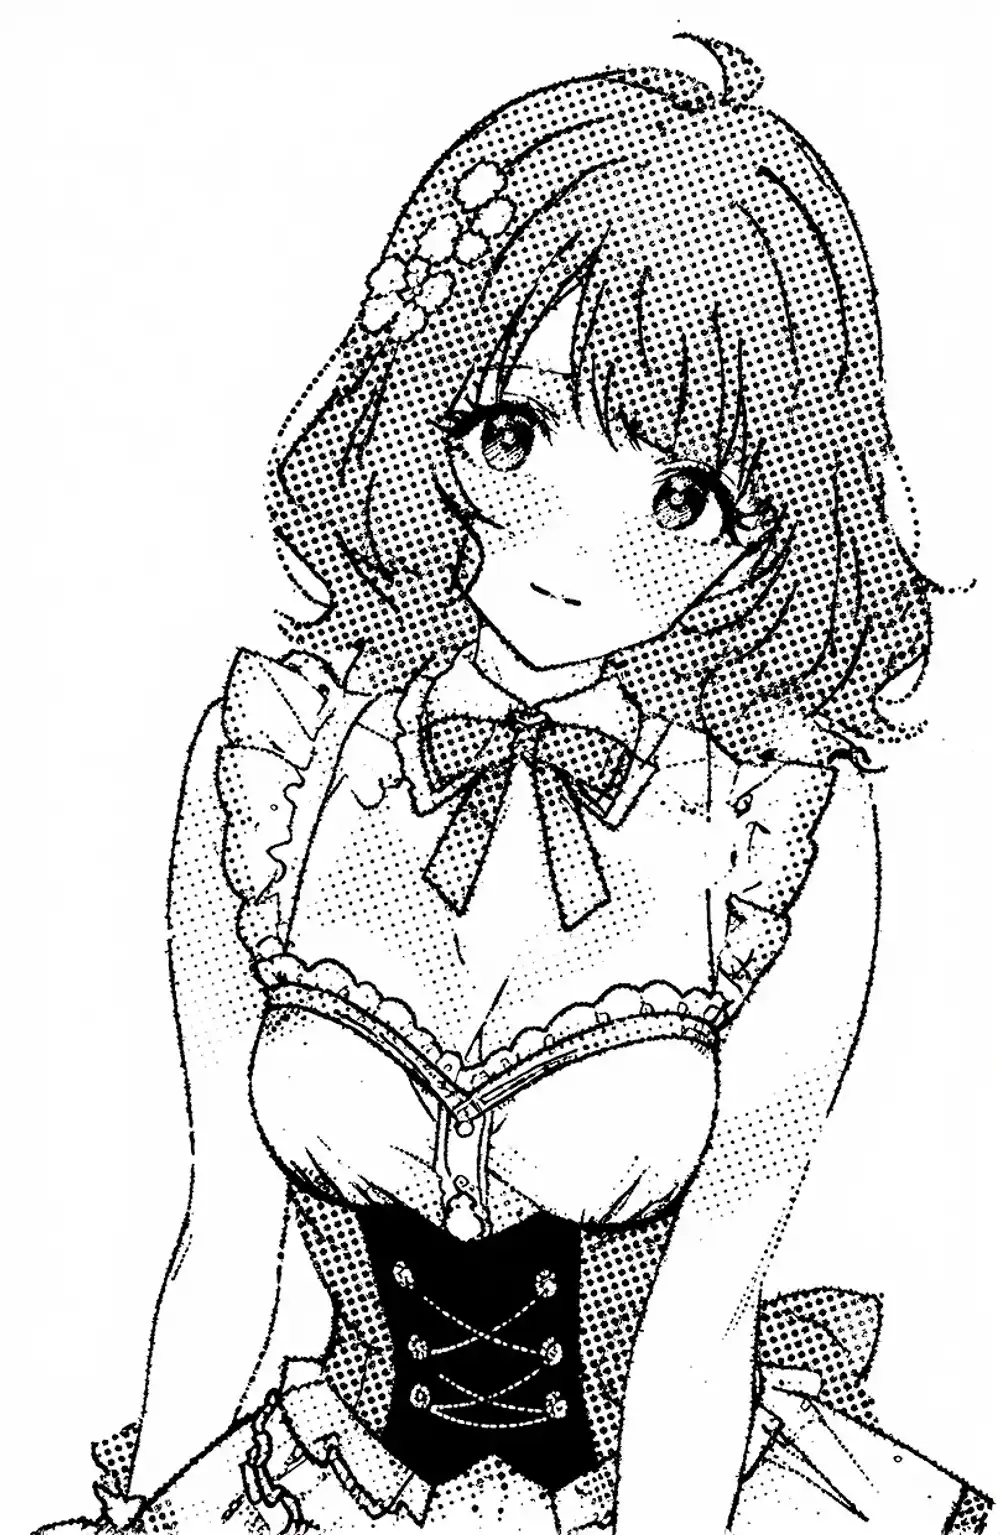
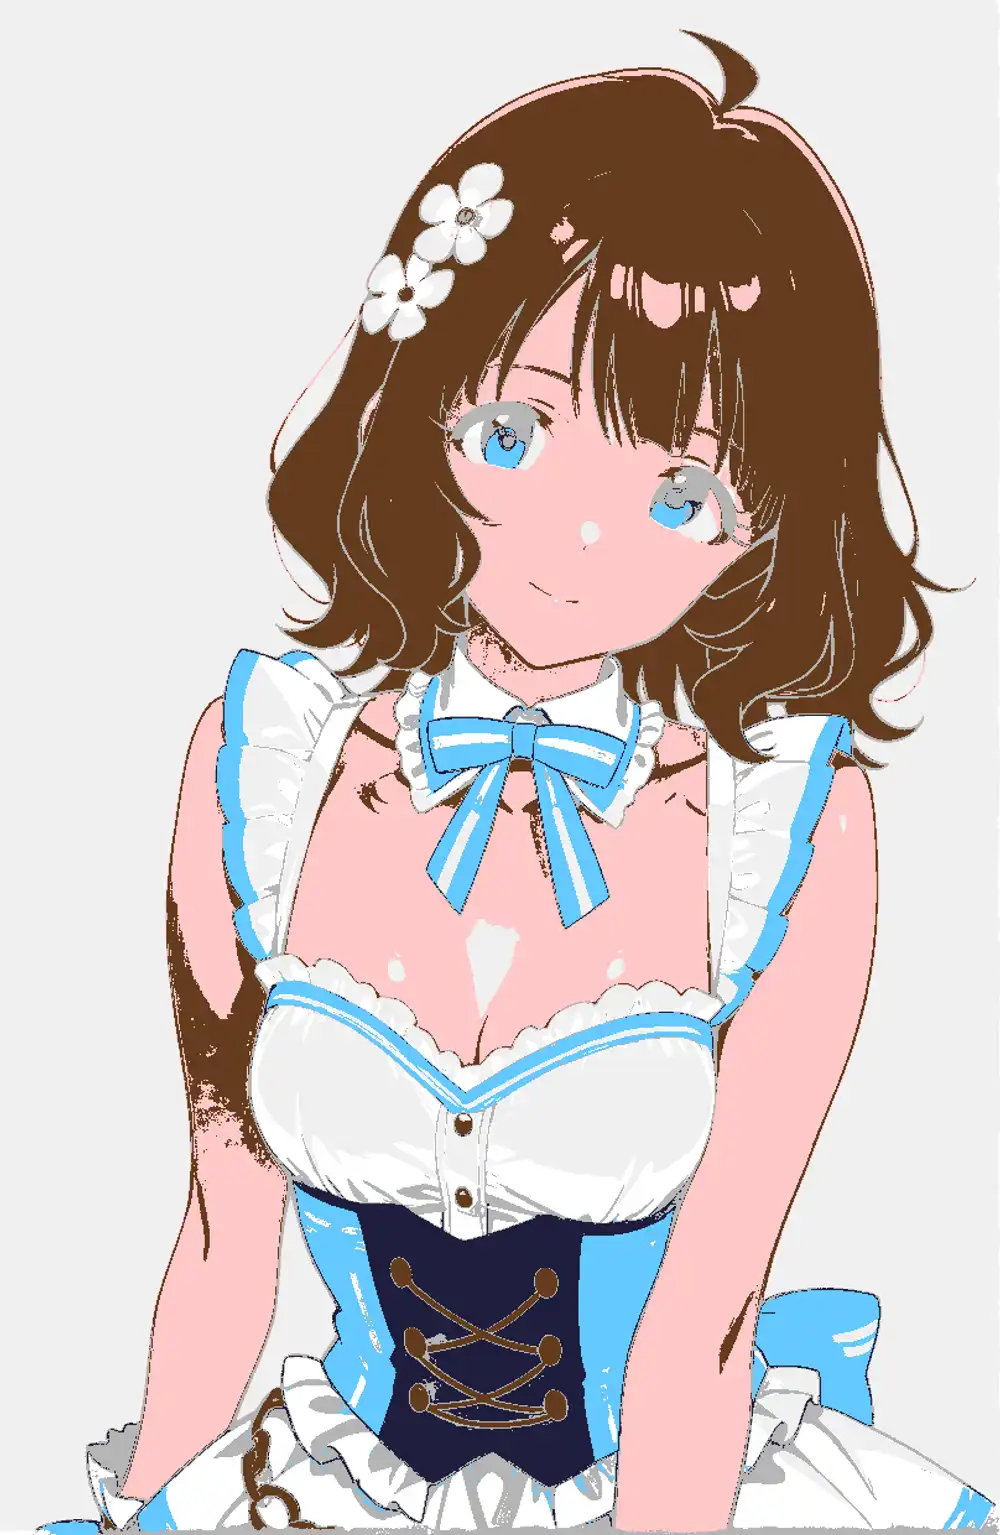
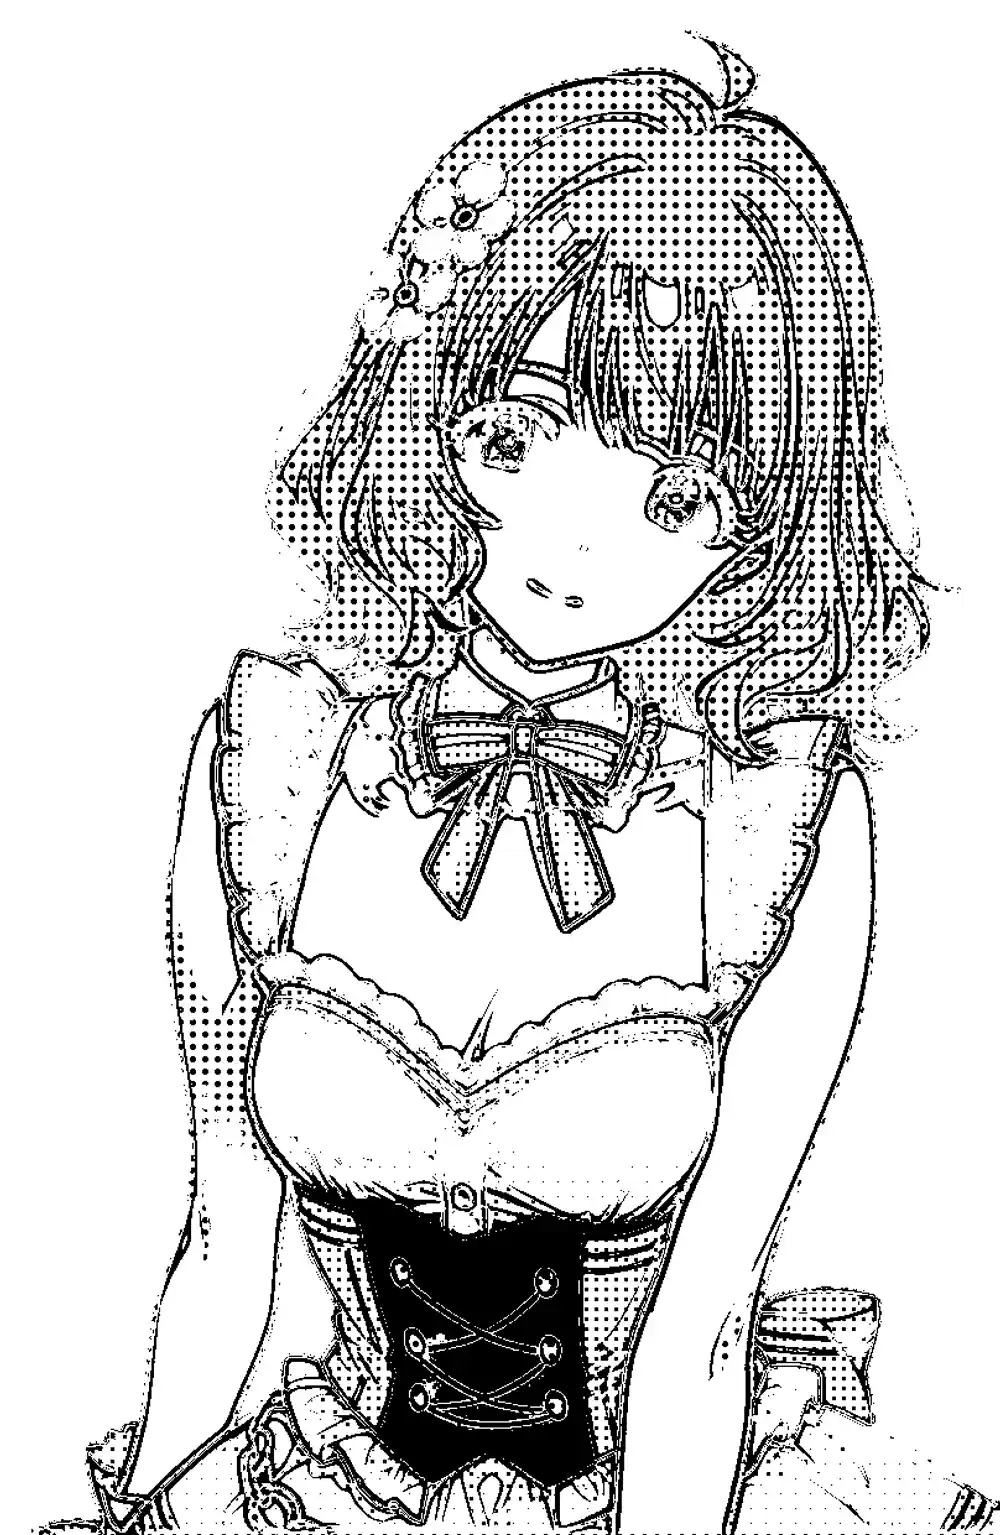
The source image and the goal-ish target line up like this.
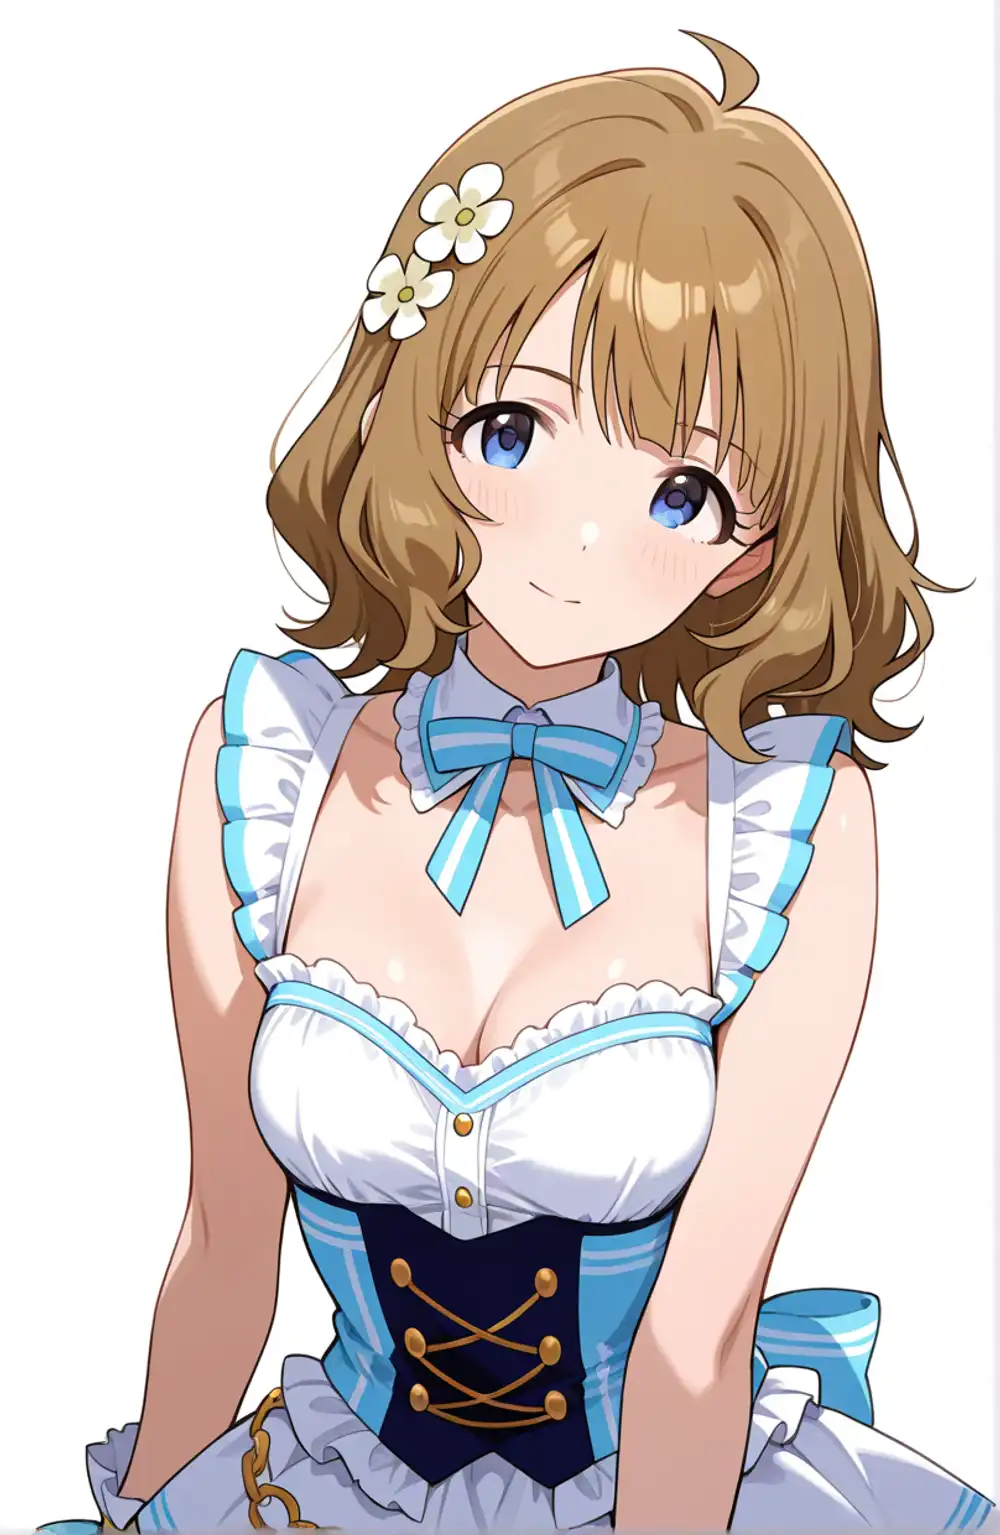

The source is a color anime image generated locally with WAI-Illustrious (SDXL). The goal-side is the same image fed to Codex and converted to manga monochrome — same composition, same face, but skin pulled to white, hair and clothing dark areas got tones, and the lines are cleaner. Reproducing what Codex came back with, but in my own local environment, is the topic of this article.
For background: the character art that ends up on this blog’s diary entries was mostly generated through Gemini’s Gem in past months, and recently I’ve switched to a self-trained LoRA on top of Anima. Anima shows up as a candidate later in the article because of that lineage.
Why plain grayscale doesn’t read as manga
A manga page reads as manga because shadows are not “gray surfaces” but “collections of halftone dots, diagonals, and hatching.”
The size of the halftone grain is the critical bit — if the dots are too fine for the output size, the eye integrates them and they collapse back into gray. Halftone reads as manga only when both tonal quantization and dot coarseness are in place, and automatic grayscale conversion misses both.
So even a “take the brightness, replace with halftone dots” pipeline needs dots that are coarse enough relative to the final output size, quantized into roughly 2-4 levels. Pasting continuous gray defeats the purpose.
What happens with AI re-generation
Telling an AI “make this manga monochrome” kept hitting the same wall: at low denoise the color stays, and at high denoise the picture itself changes.
Qwen Image Edit
I tried the local Qwen Image Edit 2511 with Lightning 4-step.
Even at 4 steps a single image took multiple minutes to come back, busted the time budget instantly, and got cut. Qwen on MPS has been known to slow down to 10 minutes after a ComfyUI update, and a similar regression has reappeared with the latest update (added as a postscript to that article), so the verification loop simply doesn’t function.
Even if you accept the speed, QIE has a tendency to reinterpret the underlying figure when you push pose or angle hard, which doesn’t mesh with the use case of holding composition and character fixed while only running processing. Cut from the main axis.
SDXL + manga LoRA via img2img
I loaded a manga-style LoRA on top of waiIllustriousSDXL and tried img2img. Opening the LoRA’s metadata, the training tags monochrome, greyscale, hatching (texture) were solidly present, so the prediction was that it would just work.
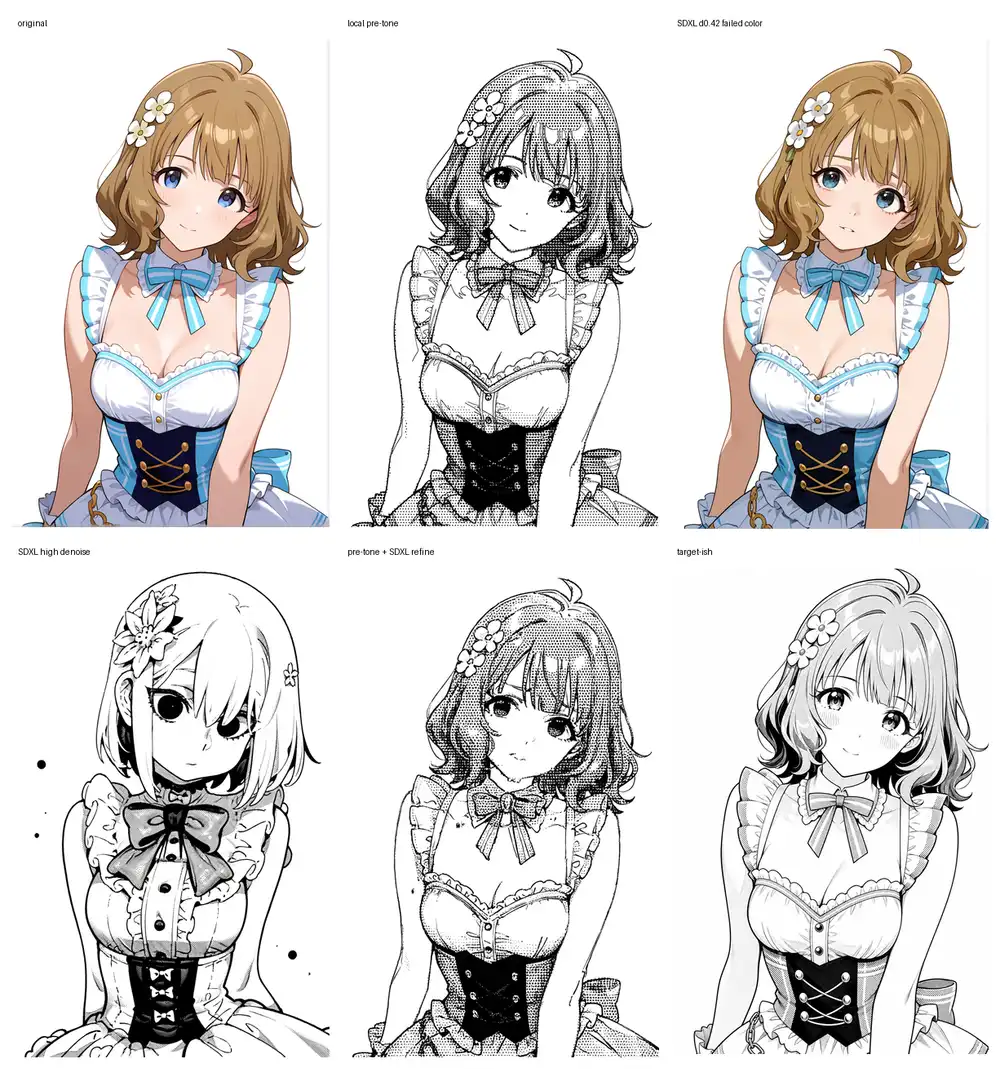
What actually came out: at low denoise the color almost completely stays and only the lines become slightly more manga-ish; raise it and clothing details and hair start drifting — a textbook overshoot. Even appending monochrome to the prompt, low denoise lacks the strength to fully kill color.
The combination that did look promising was “feed in an image already moved toward monochrome via local post-processing, and use SDXL low-denoise as a polish step.” Don’t put the AI in charge of conversion; put the local side in charge and let the AI clean up.
SD1.5 ControlNet Lineart
Combined SD1.5’s Lineart ControlNet with counterfeitV30 to see if locking composition to lines helps.
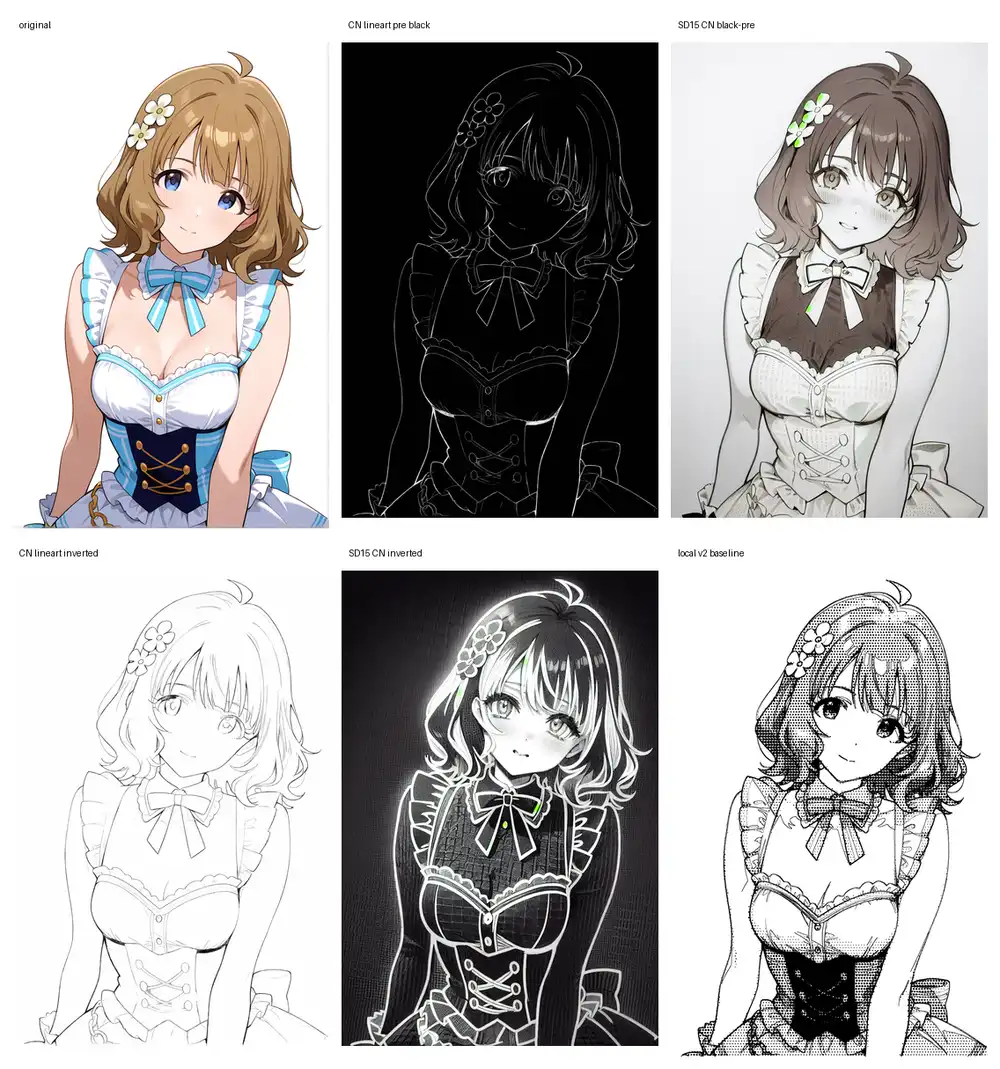
The Anime Lineart preprocessor outputs black-with-white-lines; routing that into ControlNet, color residue stayed faint and the face fell apart. Inverting to white-with-black-lines made ControlNet land harder, but the result drifted to a black-background, white-outline aesthetic. SD1.5 holds face and clothing worse than SDXL, and at ~100 sec per image the iteration loop is heavy.
ControlNet’s strength is “lock composition and redraw,” and what I want here is “don’t redraw, just make it look manga,” so this gets cut from the main axis.
Z-Image-Turbo
Dropped z_image_turbo_bf16.safetensors into ComfyUI and ran i2i.
Feeding the color original directly preserves composition and face quite well. No collapse. But the color stays just as strongly, so as a manga conversion this is a failure.
The least-bad configuration was: do local pre-processing to handle color separation + line cleanup + skin whitening, then send the intermediate result through Z-Image at low denoise as a polish.
Color is gone, face preservation is in the practical range. But Z-Image, when used as a clean-up pass, tends to reduce drawing density. The line breakage and mechanical-feel of the tones don’t get fundamentally resolved, and combined with Turbo being a distilled model, this lands in the position “useful as a polish, not a candidate for adding manga density.”
Anima Turbo (waiANIMA)
Confirmed under the operational config: waiANIMA_v10 + anima-turbo-lora-v0.1, 10 steps / cfg 1.0 / er_sde. I initially ran it without the Turbo LoRA at 30 steps, which made the comparison invalid, so I redid it under matching operational conditions.
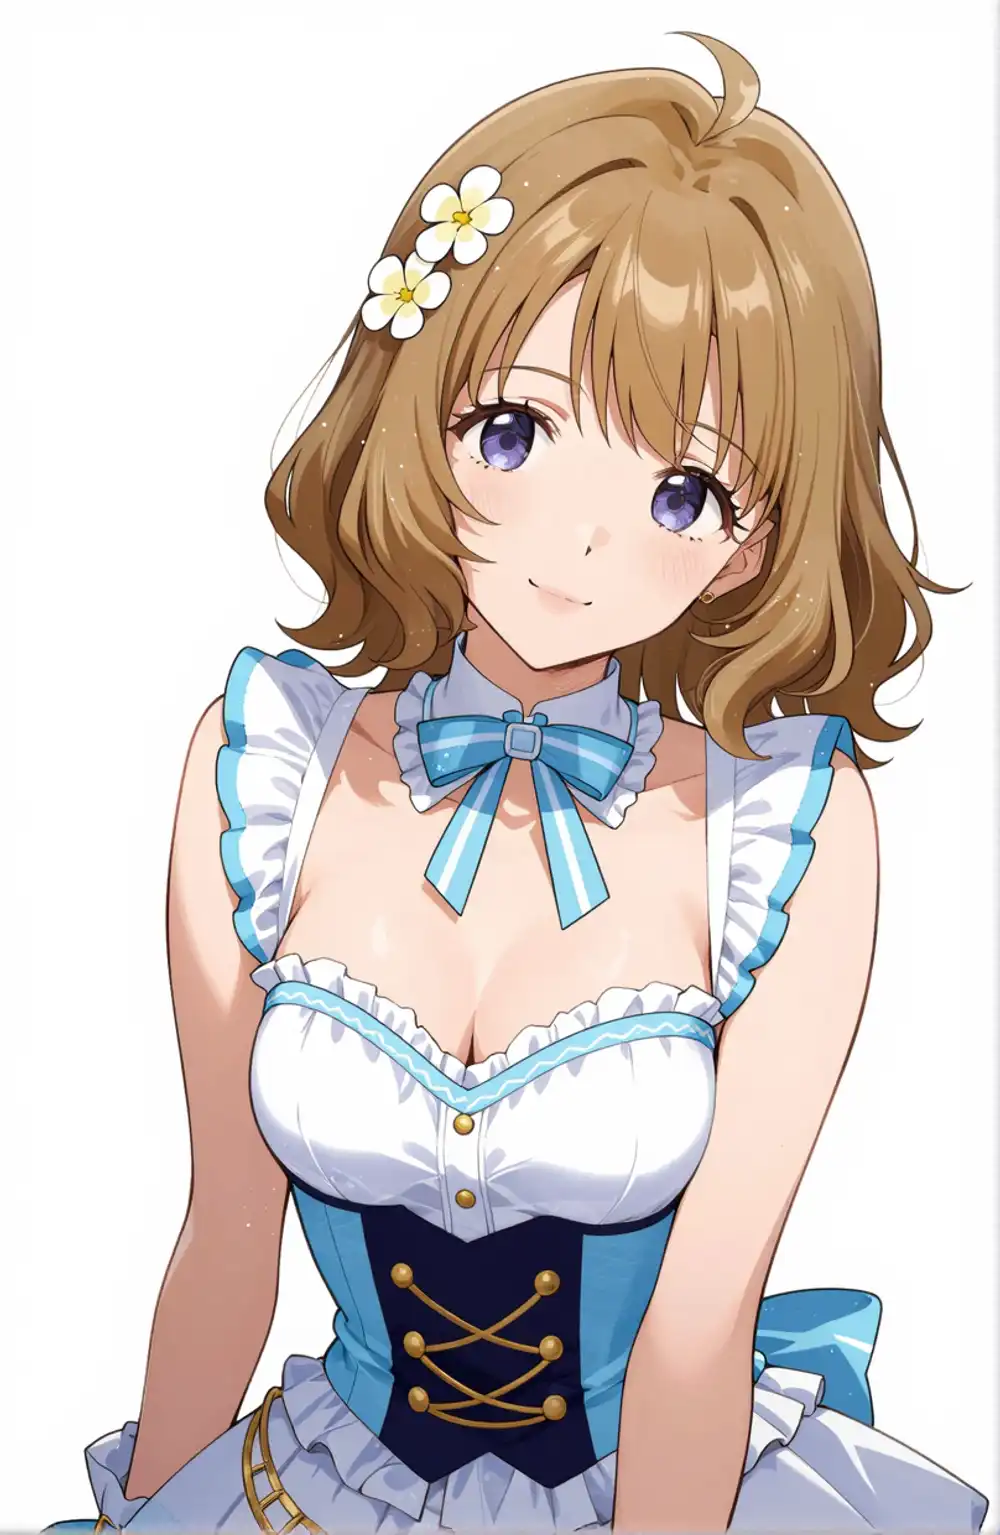
When you let it generate manga monochrome directly via txt2img, as a base model it’s the strongest of everything tried in this round.
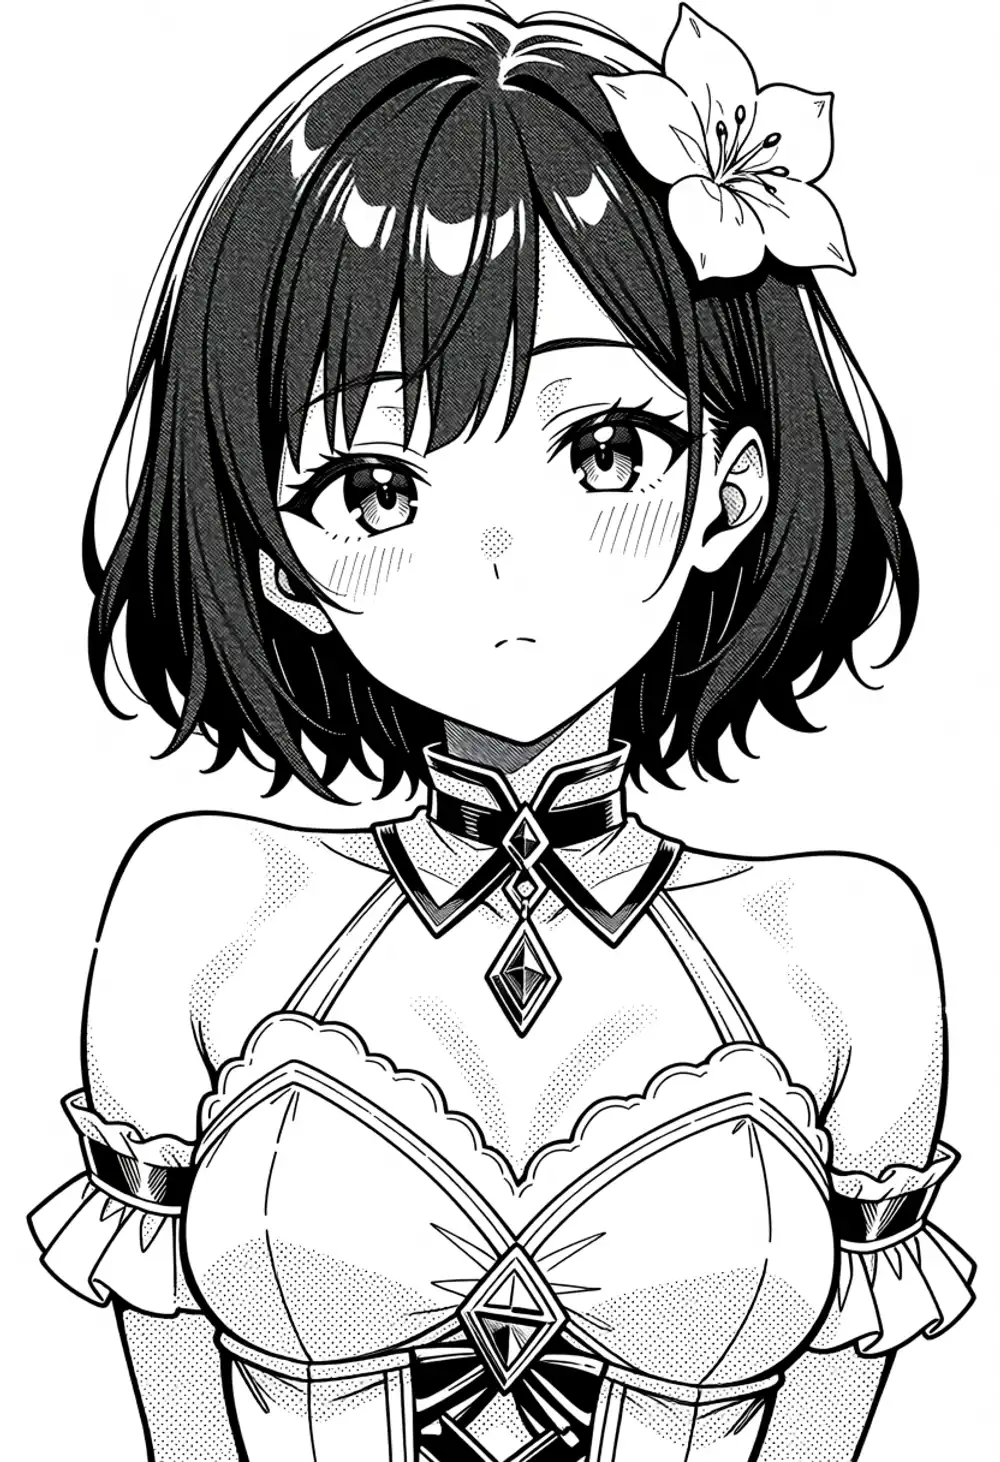
Clothing, skin, and lines all come out organized. But because this is a fresh generation, the character is no longer the original.
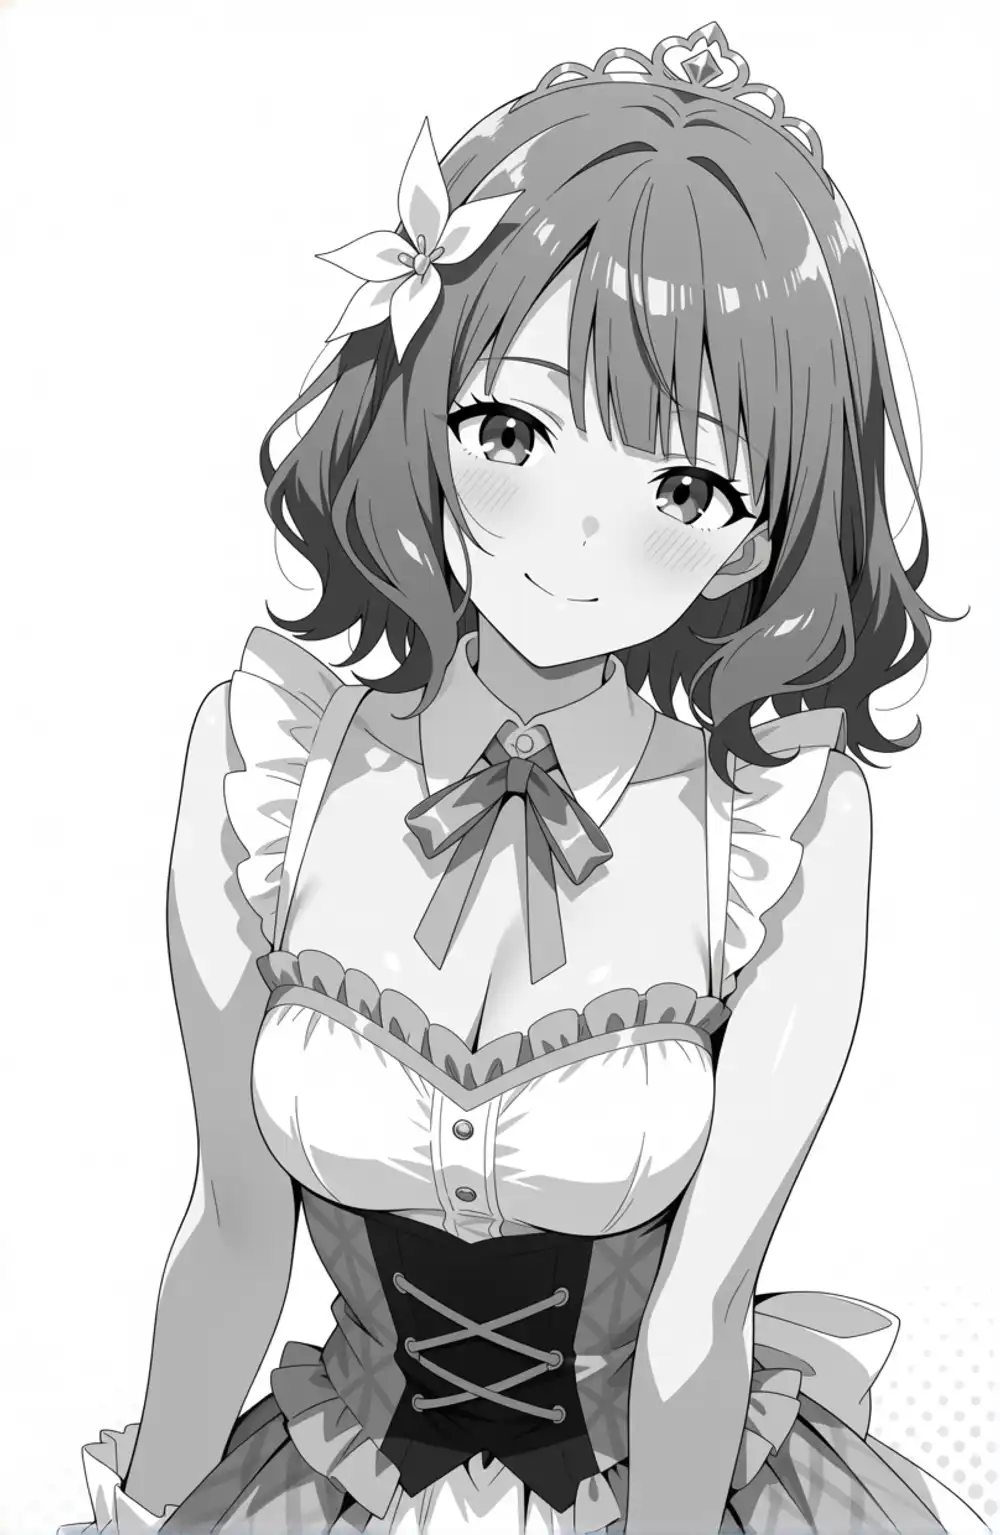
Layering the Kana LoRA on top makes character signal dominate, and the manga monochrome gets pushed back into pale grayscale or watercolor.

Weakening the Kana LoRA brings manga back, but character lock falls apart. Stacking the existing character LoRA as-is doesn’t resolve the manga-monochrome-vs-character-fix conflict.
I also tried converting the source to plain grayscale and feeding it into i2i, but at denoise 0.48 it just becomes a clean grayscale repaint, and at 0.62 with both tags and natural-language tone vocabulary stuffed in, it stays fundamentally grayscale and never reaches actual screentone.
Anima isn’t an Edit-style model, so for this kind of conversion task, “keep the same figure and replace only the tones” isn’t its lane. The conclusion: not the right axis here. As a txt2img manga monochrome generator, it’s the leading candidate.
Pushing deterministic local processing as far as it goes
With the AI-takes-the-wheel side stuck, I tried the side that doesn’t rewrite the picture (deterministic image processing) — how far can it be pushed?
The naive starting configuration: separate skin / dark areas / background by luminance, quantize the dark areas to coarse halftone, and finally overlay a Canny / color-edge-extracted line in black. v1 was the coarse quantization version; v2 used color to roughly separate skin / brown hair / blue clothing and varied tone strength per region, with three directions: hair-leaning (v2 hair), print-style (v2 print), and hatched (v2 hatch).

Quantizing tone to 2-4 levels with intentionally coarse dots erased a lot of the grayscale feel. But the line extraction is rough and picks up color and shadow boundaries as lines, dirtying the canvas. Varying tone strength by region in v2 makes things noticeably better.
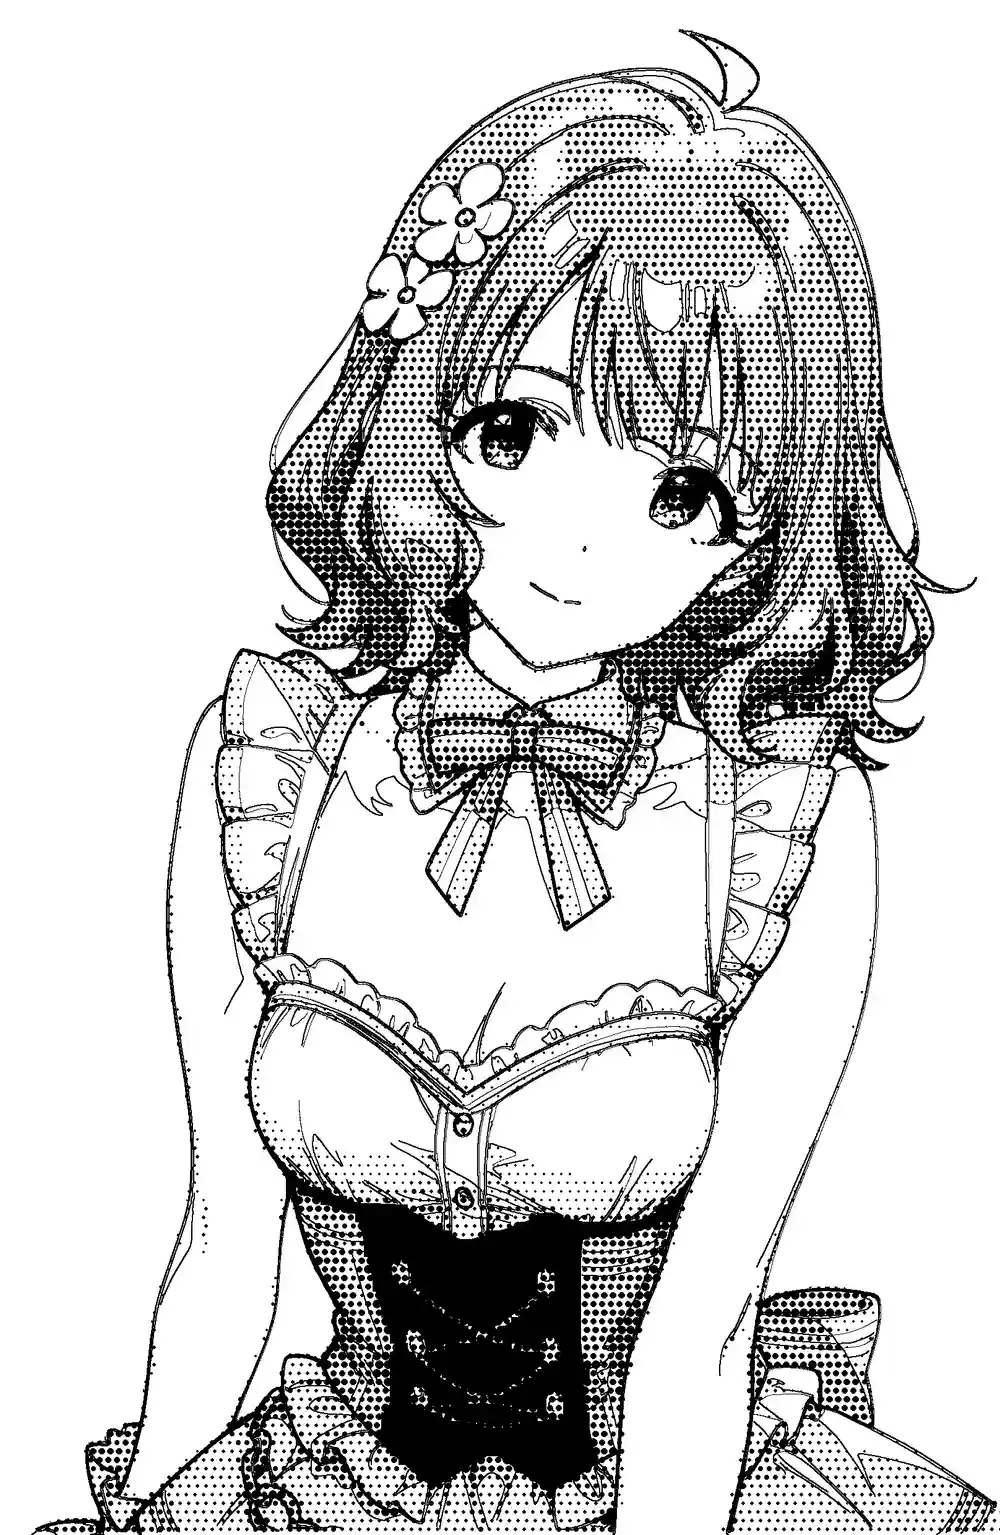
Looking at v2 hair as a single image, skin is white, halftone is on the hair, and the corset, bow tie, and frills all read normally — depending on the use case, it’s at a level where you could stop here. Honestly, displayed small it kind of works. Zooming in, though, the lines and halftone dots crowd together at the frill edges and hair tips, going stiff, with black bleeding around hair boundaries that crushes the fine detail. The remaining issue: “lines flow into the dark-area calculation as part of the tone.”
So I changed the processing order. Lines flowing in as dark-area input was the cause, so:
- First extract a line-art layer
- For tone density calculation, use a “color-only image” where those lines have been painted out
- From the color-only image, classify skin / hair / clothing dark areas, and pull skin to white, hair to mid-tone, clothing dark areas to dense tone or solid black
- Finally, overlay the originally-extracted line layer in black
In one mid-trial (v3) I pushed regional strength too hard, and the dark areas of hair and clothing collapsed into large black blobs (v3 failed panel below). Pulling the regional strength back and properly separating line extraction from color-area processing landed at v6, which finally clicked.
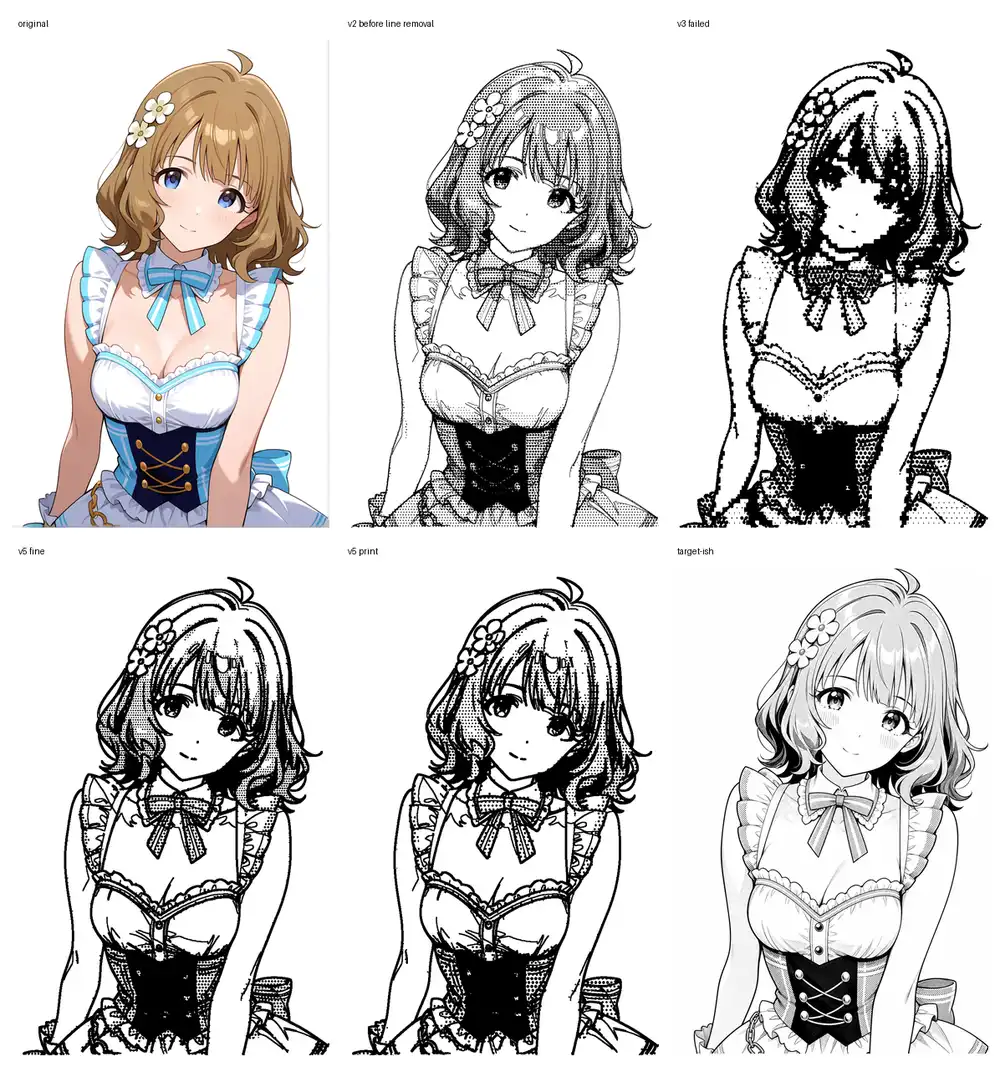
v6 fine is line-emphasis with light halftone, v6 print assumes print output and lays halftone on more heavily. Line darkness no longer mixes into tone density, so black around line boundaries decreases, and hair tones coexist with white-skin pull-out. The shape of the original is preserved far better than any AI re-generation.
But this looks less like manga and more like a “badly drawn picture.” The lines are thick and stiff, the tone is just uniform application without intent. Unlike v2 hair, which held together when displayed small, v6 looks off regardless of size. As a process, “lines don’t merge into dark areas” is the right direction in principle, but visually it’s actually a regression — unusable as a final on its own.
The strengths of deterministic processing are “doesn’t change the picture” and “reproducible,” but it can’t push hard enough to reach the manga-conviction level.
The path of decomposing into parts and applying tone mechanically
All the trials so far have been trying to decide tone density across the whole image as a single pass. That’s a bad framing.
A manga page assigns different density, different angle, and different patterns to “skin,” “hair,” “clothing light,” “clothing dark,” “frills,” and “decorative metal.” The handwork is “this area is screen #60, this area #50, this area solid black” — varying instructions per region is the essence. A process like v6 that pastes uniform halftone over the whole image is a fundamentally different process from manga.
The closest match to that framing is to reuse the See-through anime layer decomposition into 23 layers from a prior article, decomposing the image into parts first, then:
- Apply deterministic dot patterns of different density and angle per layer
- Keep the line layer extracted separately
- Composite at the end
That flow. AI is used only for part decomposition, all tone processing is mechanically determined, so reproducibility holds and the conversion stays under our control. The “lines don’t merge with tone” mechanism v6 reached can be implemented at the part level rather than the surface level.
See-through itself doesn’t run on M1 Max
While writing this article I tried to spin up See-through locally. Cloning the repo (shitagaki-lab/see-through) and looking at common/utils/inference_utils.py, device='cuda' is hardcoded in multiple places. The LayerDiff pipeline’s VAE / trans_vae / UNet / text encoder are all pinned to cuda with bfloat16.
layerdiff_pipeline.vae.to(dtype=torch.bfloat16, device='cuda')
layerdiff_pipeline.trans_vae.to(dtype=torch.bfloat16, device='cuda')
layerdiff_pipeline.unet.to(dtype=torch.bfloat16, device='cuda')
The requirements explicitly pin torch==2.8.0+cu128, so the configuration assumes CUDA. To run on M1 Max, the code needs MPS-side patches, dependencies need to be re-aligned to MPS builds, and on top of that, ~14GB of models (LayerDiff 9.5GB + Marigold 3.1GB + SAM 1.3GB) need to be downloaded and placed. That’s not work that fits inside a 2-3 minute verification loop, so See-through itself is recorded as a “skipped due to time budget” entry. The original See-through verification was also done on RunPod with an RTX PRO 6000 rental.
Instead, ran an approximation that fits locally
See-through-grade decomposition isn’t reachable, but the proposal’s core (mechanically composite different-density dot patterns per region) can be tested even with crude masks made by HSV clustering. OpenCV finishes it in under a second.
Region separation is just color thresholds: background (high value, low saturation), skin (warm hue, low saturation, high value), hair (brown family, mid value), corset (dark blue), blue accents (bow tie, accent colors), frill (white-ish), other — 7 categories.
Then I overlaid different-density, different-cell-size dot patterns per region, and laid a DoG-based line layer on top in black. Skin and background got no tone (pure white), corset got solid black, hair and accents got medium density, frill got ultra-light — a simple per-region assignment.
The honest verdict: as a picture, it just looks blurry and scattered. The differential assignment — corset is solid black, frill stays white — does come through in principle, but the masks split via HSV thresholds are too rough; hair, eyes, and skin boundaries bleed into the halftone side, and the DoG lines break up and scatter across the canvas. Nowhere near a state you could call “per-region differentiation.”
What this round actually confirmed is the inverse of a positive result.
- The proposal’s core (mechanically composite different-density dots per region) is light enough that even a sloppy compositor runs it
- Conversely, no matter how correct the compositor is, output collapses the moment mask precision is low. 7-region HSV isn’t enough
- The success or failure of this direction hinges entirely on whether See-through-grade masks (front and back hair separated, eyes independent, frill and skin separated) can be obtained
In other words, “if masks are crude, composition is meaningless” and “even pristine composition is meaningless on its own” — that’s the only practical takeaway from this local approximation. To reach the actually-targeted quality, the split has to shift to: generate precision masks + alpha-aware occlusion completion via See-through in the cloud → bring masks back local and run per-region halftone composite.
Another path: put a grayscale-only LoRA on Anima
Up to here I’d been thinking under the premise of “paste tone on the composition side,” but that view can be inverted. Anima’s txt2img already produces fairly clean manga monochrome on its own (the image shown in the Anima Turbo (waiANIMA) section above — clothing, skin, lines, and tone all come out reasonably organized). Given that the base model has the ability to draw manga monochrome, it makes more sense to let the model itself produce it rather than outsourcing to compositing.
The LoRA in that direction is configured as:
- The character training data is all grayscale + solid black + line art only (halftone / screentone is not mixed in — reason below)
- Zero color images in the training data
- Layered onto Anima-family (a base that produces manga monochrome) for training
If there’s no color information in the training data, the LoRA can’t carry “color” as a character-fixing signal. As a result, only character shape, hair style, facial features, and clothing structure get fixed, and the output mode leans on Anima’s native manga monochrome.
The previous “color Kana LoRA + Anima” combination got pushed back toward pale grayscale or watercolor as the LoRA strength went up. A grayscale-only LoRA never learned color in the first place, so this issue doesn’t arise in principle.
The reason to remove halftone is on the VAE side. If you mix it in, the dot pattern collapses while passing through VAE encode/decode, and what the LoRA actually learns isn’t halftone itself but a corrupted form of it that resembles dirty grayscale. The fact that adding screentone halftone to a prompt on Illustrious or Qwen Image doesn’t yield clean halftone but instead a faded grayscale image reads naturally as the result of training data where halftone got mixed with solids and grayscale and the dots were stored already corrupted.
Conveniently, Anima base already produces clean halftone via txt2img on its own, so the LoRA side doesn’t need to learn halftone. The LoRA only needs to learn the character’s shape and the placement of white / gray / solid black surfaces — at inference, Anima base lays the halftone. The LoRA supplies a colorless character conditioning, and that’s the division of labor.
Other base models fall out for this use case.
| Candidate | Why not adopted |
|---|---|
| WAI-Illustrious | Tried before in the same direction; the output leans toward “rough grayscale” rather than dots, and never reaches manga manuscript tone |
| Z-Image / Z-Image-Turbo | Tendency to redraw the input precisely; doesn’t fit the use case of running while preserving tones |
| Qwen Image + LoRA | Same redraw issue as QIE expected. On top of that, the runtime cost on M1 Max blows past the time budget (2-3 min) immediately |
In the end, the only base that produces manga monochrome stably and that I can run on my own machine is Anima. This proposal stands independently of the See-through part-decomposition + composite path above. Looking at Anima txt2img’s output quality, this side has lower implementation cost.
That said, all of the above is hypothesis-level, and you can’t tell until you actually run it. There’s a perfectly reasonable chance the entire approach falls apart at “the LoRA simply doesn’t output grayscale” or “even without halftone in the data, the dot side gets crushed crossing the VAE.”
Last time I pushed an Anima character LoRA up to 12,000 steps the training data was already in place from prior rounds and only the captions got minor adjustments — even so, training plus best-epoch extraction took 17 hours. This time it starts from building the pipeline that newly generates grayscale-specific training data, plus environment setup, so a full day or more is the realistic floor.
Honestly, I’d rather not go through another “endless grid of grayscale Kana causing gestalt collapse” experience like the previous article — feels like it’d actually break my brain — so the next one will probably open cooking-show style with “and here we have a finished LoRA.” That’s the plan…