OKLab + material penalty vs RGB nearest for LEGO mosaics: 0.15 is 7× overkill
 Contents
When you convert a photo into a LEGO mosaic, picking the RGB-nearest brick color drifts skin tones toward green.
Hair collapses into a dark blob, with no flow or outline left.
BMBrick’s How I Built a Perceptual Color Quantization Engine for LEGO Mosaics is a short implementation note about fixing this failure with OKLab, a material-difference weight, and local denoising.
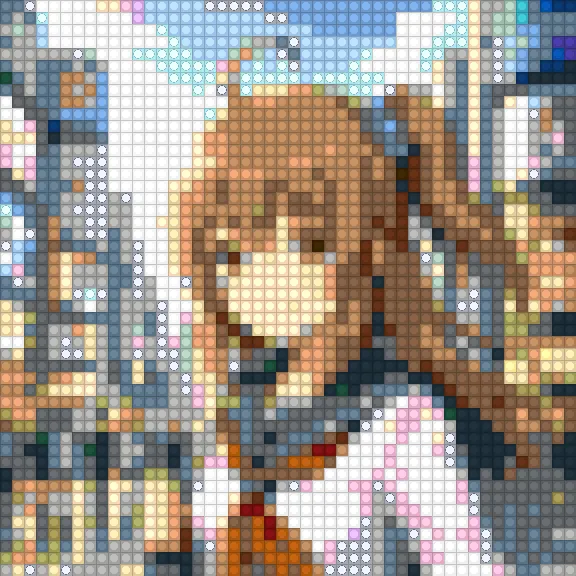
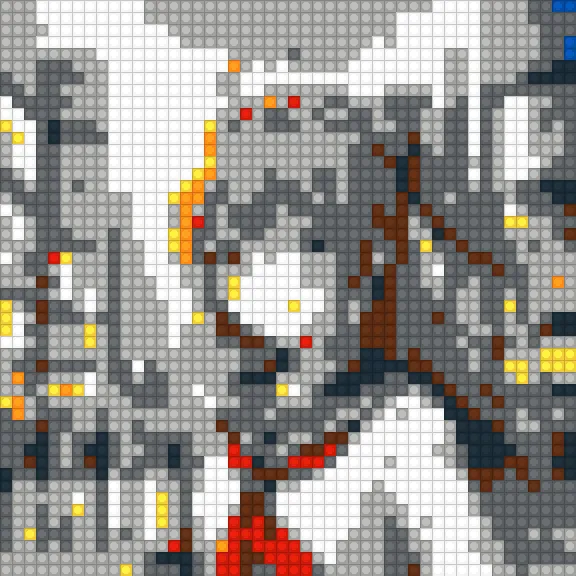
Reading alone didn’t quite click for me, so I built a 45-color LEGO-like palette in Node + sharp, scaled two pictures of Kana-chan — one on a plain white background, one against a Shibuya scramble crossing — down to 48x48, and ran four variants side by side.
On the complex background, RGB nearest paints 368 out of 2304 pixels (about 16%) with Metallic Silver, Glitter Trans-Clear, and transparent bricks, sprinkling the white sailor shirt with what looks like silver dust and confetti.
Switching to OKLab + a material penalty drops non-solid bricks to zero, and the result looks like “a photo built out of plain solid LEGO.”
This may look like a niche LEGO trick, but it’s the textbook trap of fixed-palette quantization.
I’ve stepped on the same trap with pixel-art conversion more than once.
In Trying to convert photos into pixel art with Qwen Image Edit, pure JS quantization with Median Cut and nearest-neighbor downsampling made the skin look off, and I ended up switching to Illustrious i2i + the pixel-art-xl LoRA.
In Trying pixel-art conversion with Z-Image i2i, what really decided the look was the palette/downsample combination, not the choice of LoRA.
LEGO mosaics differ from that series in that you can’t just tell an AI to “draw it nicely.”
You have to fit physically existing official bricks, so you can’t escape designing the distance function and the post-processing.
RGB distance doesn’t match what humans see
The RGB Euclidean distance is easy to compute.
For a pixel (r, g, b) and a candidate color (R, G, B), you roughly measure the difference like this.
const dist =
  (r - R) ** 2 +
  (g - G) ** 2 +
  (b - B) ** 2;
As a numerical difference on a display, this is natural.
But it doesn’t match the “close color” feeling for the human eye.
The same numerical gap stands out differently in shadows, highlights, and saturated regions.
For something like skin, where even small hue shifts look unsettling, the mismatch is very visible.
BMBrick switches this part to OKLab.
OKLab is a perceptually near-uniform color space proposed by Bjoern Ottosson in 2020, designed so that numeric distance lines up with perceptual difference.
Like the older CIELAB, it brings “do humans see these as close?” into the distance computation, but it’s easier to implement and has spread as CSS Color 4’s oklab() / oklch().
If “perceptually uniform” still sounds abstract, my earlier article on accurately rendering the visible spectrum — Abney effect, CIE 2012 color-matching functions, and so on — gives the background.
The human retina and brain don’t perceive raw wavelength or RGB-component differences as color differences directly.
In the blue–purple range, tiny hue shifts are very visible; in shadows, hue differences stand out more than brightness differences.
OKLab is a correction that absorbs this nonuniformity inside the distance computation, which is also why RGB distance breaks down in sensitive regions like skin.
In fixed-palette quantization, this is the first fork in the road.
Picking the RGB-nearest color is mathematically correct but visually wrong.
Picking an OKLab- or Lab-nearest color at least lines up “why that color was picked” with how a human sees it.
LEGO bricks are matched by color AND material
What’s interesting in the original isn’t just switching to OKLab.
LEGO red isn’t just red.
There’s matte red, transparent red, metallic, glitter — the material changes how the surface reflects.
In the code example, a material penalty is added to the OKLab distance.
function colorDistance(pixel, brick) {
  const labDist = oklabDistance(pixel, brick.color);
  const materialPenalty = pixel.material !== brick.material ? 0.15 : 0;
  return labDist + materialPenalty;
}
The 0.15 is not a magic correct value; it’s a weight for mixing “how the real material looks” into the distance function.
A red that’s nearby in the photo can still look wrong if you use a transparent brick for the shadow of a face.
RGB or OKLab distance alone can’t handle “wrong because the material doesn’t fit.”
This applies beyond LEGO too.
With embroidery thread, beads, print inks, e-paper, or a fixed CSS-color token system — anywhere the output material or display environment is fixed — picking candidates by color difference alone will go wrong.
Fixed-palette quantization isn’t just “have a list of palette RGBs”; it’s a constraint problem that also includes the usability and texture difference of each color.
Median Cut builds the palette, but doesn’t check candidate quality
Color quantization actually mixes two roles.
One is palette generation (choosing which N colors to use), the other is assignment (which palette color each pixel becomes).
Well-known algorithms — Median Cut, K-means, Octree, NeuQuant — mostly handle the former.
This blog’s pixel-art conversion tool builds the palette from the image via Median Cut, then replaces each pixel with the nearest palette color.
This is fast enough for casual pixel-art conversion.
It runs entirely in the browser with Canvas, with no need to send the file to a server.
But what Median Cut does is “build representative colors from the source image.”
For LEGO mosaics, where the usable colors are already fixed, the story is a bit different.
You’re not building ideal representatives from the input; you have to push pixels into the colors that exist as official parts.
What matters here isn’t palette generation but assignment — the quality of the distance function.
graph TD
    A[Input photo] --> B[Downscale]
    B --> C[Per-pixel color]
    C --> D[Fixed LEGO palette]
    D --> E[Pick candidate by perceptual distance and material weight]
    E --> F[Suppress local noise]
    F --> G[Buildable mosaic]
In your own pixel-art conversion, you can build the palette to fit the input image.
With LEGO or print, the output palette is fixed in advance.
This difference is large.
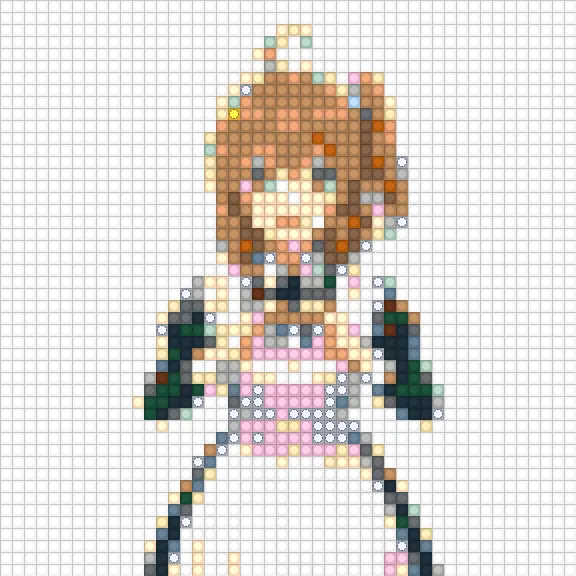
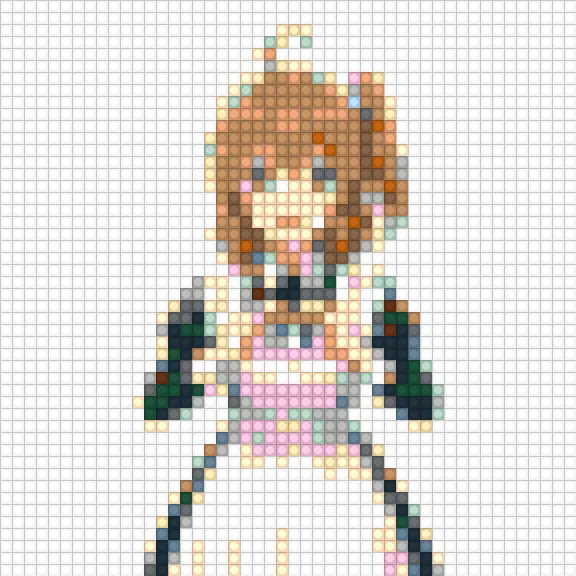
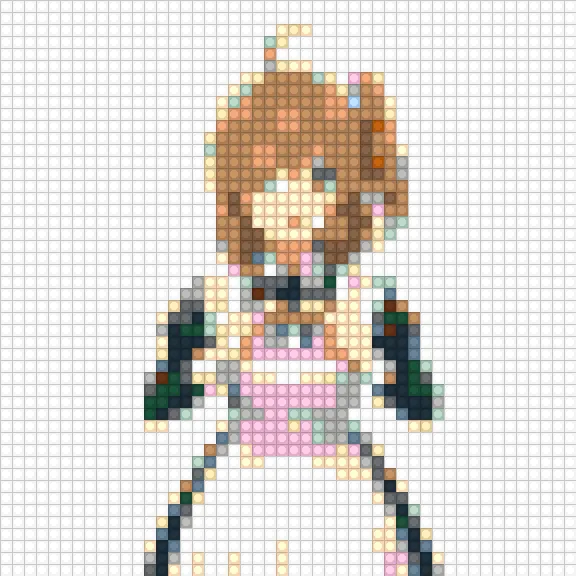
Running four variants on Kana-chan at 48x48
Theory only goes so far without seeing the result, so in Node + sharp I built a 45-color LEGO-like palette and ran two input images at 48x48 through four variants.
One input is Kana-chan in a maid outfit on a white background — a simple image where about 73% of the frame is white and almost no color discrimination is needed.
The other is Kana-chan in a sailor uniform standing in front of a Shibuya scramble crossing — a complex image full of crowds, signs, sky, and buildings.
I wanted to see how the same distance-function quirk gets amplified by how candidate colors are spread across the frame.
The palette is solid 37 official-LEGO-inspired colors plus Trans 5 / Metallic 2 / Glitter 1 to make the distance-function comparison visible.
The input is a photo, so all input pixels are treated as solid, and the material penalty against Trans/Metallic/Glitter is 0.15, as in the original.
OKLab conversion is a straightforward linear sRGB → LMS → cube root → matrix implementation. Instead of converting on every pixel, I precompute the OKLab values for the palette and cache them.
function linearToOklab(r, g, b) {
  const l = 0.4122214708 * r + 0.5363325363 * g + 0.0514459929 * b;
  const m = 0.2119034982 * r + 0.6806995451 * g + 0.1073969566 * b;
  const s = 0.0883024619 * r + 0.2817188376 * g + 0.6299787005 * b;
  const l_ = Math.cbrt(l), m_ = Math.cbrt(m), s_ = Math.cbrt(s);
  return {
    L: 0.2104542553 * l_ + 0.7936177850 * m_ - 0.0040720468 * s_,
    a: 1.9779984951 * l_ - 2.4285922050 * m_ + 0.4505937099 * s_,
    b: 0.0259040371 * l_ + 0.7827717662 * m_ - 0.8086757660 * s_,
  };
}
For despeckle, I went with the simplest form: for the target pixel, look at its 4-neighbors; if 3 or more share the same color, replace the center with that majority color.
You could use 8-neighbors or a threshold of 5, but for now I just wanted to see if the effect was real.
Simple background: maid Kana-chan on white
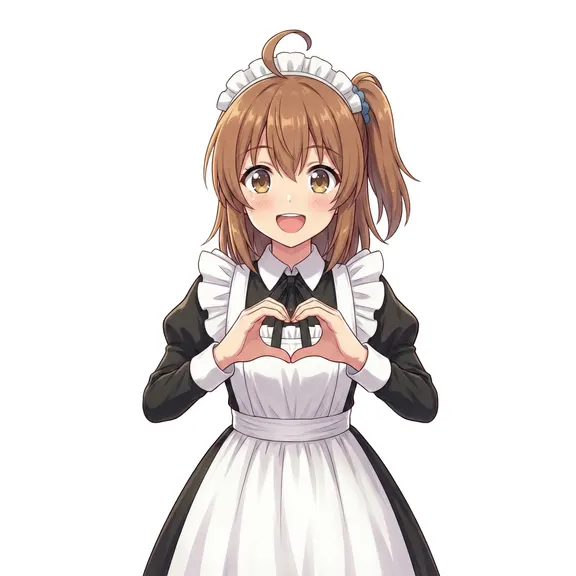
Once downscaled to 48x48, the four variants paint it differently.

| Variant | Solid | Trans | Metallic | Glitter | Top skin-area colors |
|---|---|---|---|---|---|
| RGB nearest | 2097 | 0 | 52 | 155 | Medium Nougat 96, Nougat 49, Bright Pink 82 |
| OKLab nearest | 2125 | 0 | 49 | 130 | Medium Nougat 113, Light Nougat 73, Nougat 43 |
| OKLab + material | 2304 | 0 | 0 | 0 | Medium Nougat 113, Light Nougat 105, Nougat 44 |
| OKLab + material + despeckle | 2304 | 0 | 0 | 0 | Medium Nougat 125, Light Nougat 100, Nougat 41 |
In this case, the white background occupies 1686–1695 pixels out of 2304 (about 73%) — most of the frame.
Non-solid contamination is only about 207 → 179 pixels (~9% → ~8%), and despeckle only flips 44 pixels (~1.9%).
Even so, switching to OKLab bumps Light Nougat from 73 to 105 pixels on the face, moving the skin brightness in the direction we’d expect.
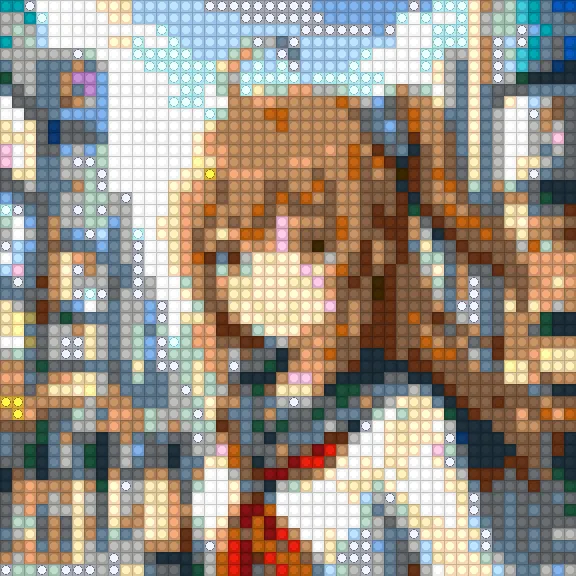
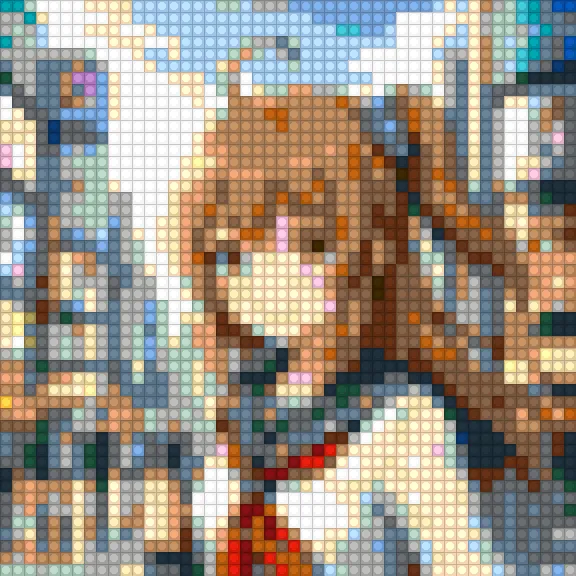
Complex background: Shibuya-scramble sailor Kana-chan
The bigger the spread of candidate colors, the more clearly distance-function quirks show up. So I ran the same experiment against an image with crowds, signs, sky, buildings, and street gradients in the background.


| Variant | Solid | Trans | Metallic | Glitter | Top colors |
|---|---|---|---|---|---|
| RGB nearest | 1936 | 51 | 97 | 220 | Dark Bluish Gray 254, Medium Nougat 244, Glitter 220 |
| OKLab nearest | 1979 | 62 | 106 | 157 | Medium Nougat 279, Dark Bluish Gray 214, Glitter 157 |
| OKLab + material | 2304 | 0 | 0 | 0 | Medium Nougat 279, Light Bluish Gray 221, Dark Bluish Gray 214 |
| OKLab + material + despeckle | 2304 | 0 | 0 | 0 | Medium Nougat 288, Light Bluish Gray 232, Dark Bluish Gray 228 |
Non-solid contamination swells to 368 pixels (~16%) with RGB, turning into “cherry-blossom petals and silver foil” on top of the white sailor uniform.
Switching to OKLab drops it to 325, but that’s still 14%.
Adding the material penalty cuts it to zero in one step, and despeckle then pulls 139 pixels (~6%) into the majority.
What the two cases say together
The spread of candidate colors amplifies distance-function quirks.
The simple case has 9% non-solid contamination; the complex case has 16%, and despeckle’s effect grows from 1.9% to 6%.
Put another way, a distance function that works on a simple image can fall apart on a complex one.
OKLab moves things in the correct perceptual direction.
The dominant skin color shifts from Medium Nougat toward Light Nougat, the pink speckling drops, and the sky gradient becomes visible.
But it can’t fully eliminate non-solid contamination — over 10% remains in the complex case.
The 0.15 material penalty is a weight that layers “real-world constraints” on top of perceptual distance, pushing photo → solid-brick selection.
Drop it to 0.01 and glitter would come back. It’s a weight, not a threshold.
Despeckle’s reach depends on image complexity.
For a simple image it has little to do; for a complex image it smooths hundreds of stray pixels in the sky and hair.
It’s a cheap way to settle “correct per pixel but visually out of place when built” points.
Pushing the experiment further
So far this has been a re-run of BMBrick’s original approach.
Since the script was already there, I pushed it into directions the original didn’t touch.
Material penalty 0.15 is 7× overkill
BMBrick’s code uses materialPenalty = 0.15.
The article doesn’t explain how that number was chosen, so I swept it from 0.00 to 0.50 on the complex input.
| penalty | Solid | Trans | Metallic | Glitter | Non-solid total |
|---|---|---|---|---|---|
| 0.00 | 1979 | 62 | 106 | 157 | 325 |
| 0.02 | 2304 | 0 | 0 | 0 | 0 |
| 0.05 | 2304 | 0 | 0 | 0 | 0 |
| 0.15 | 2304 | 0 | 0 | 0 | 0 |
| 0.50 | 2304 | 0 | 0 | 0 | 0 |
0.00 is just “OKLab nearest” — matches the earlier section.
By 0.02, non-solid contamination is already completely gone.
So the original 0.15 is more than 7× the value needed to wipe out non-solids.
For “photo → solid-only” combinations, this is a “set it high enough and it’s safe” kind of weight — no fine tuning needed.
On the other hand, for images where you do want glitter or transparent bricks (night sky, water, gemstones), 0.15 would lock them out forever; you’d need a smaller value, or to switch the weight per region.
Out of 45 palette colors, how many actually get used
With OKLab + material penalty 0.15, I counted which of the 45 palette colors actually appear in the output.
| Input | Colors used / 45 | Never called |
|---|---|---|
| Simple (maid Kana-chan) | 16 | 29 |
| Complex (Shibuya Kana-chan) | 28 | 17 |
Colors never called in either case are, naturally, the 8 non-solid colors (Trans 5 + Metallic 2 + Glitter 1) that the material penalty rejects.
Beyond those, Coral, Yellow, Orange, Green, Bright Green, Lime, Olive Green, Dark Purple, and Lavender are also unused in both cases — saturated, primary-like colors barely appear in photo-based mosaics.
The top users on the complex side are Medium Nougat 279 (skin + hair), Light Bluish Gray 221 (signs and pavement), Dark Bluish Gray 214 (shadow and skirt), Medium Brown 203 (hair shadow), White 201 (sailor uniform), and Sand Blue 197 (sky and distant background) — pale midtone bricks dominate most of the frame.
For “turn a photo into a LEGO mosaic,” you really don’t need to buy the saturated, primary-colored bricks.
You want depth in mid-grays, beige, sky blue, and skin tones — which is also a useful guideline when you actually shop for parts on BrickLink.
What happens to skin if the skin-tone bricks aren’t on the shelf
I dropped Light Nougat / Medium Nougat / Nougat from the palette and re-ran the complex case with the same settings.
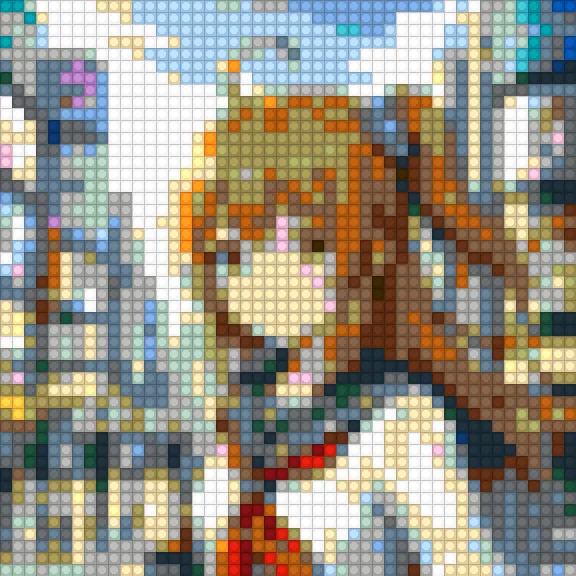
The lead skin colors Medium Nougat 279, Light Nougat 186, Nougat 85 are gone, and that mass flows into Light Bluish Gray 279, White 269, Tan 233, Dark Tan 192, Medium Brown 204.
In short, the skin region is replaced with a mottled gray-and-light-brown patch, and the face stops being readable.
When building an anime-style character in LEGO, whether you have the three Nougat skin colors on hand completely changes how readable the result is. Adding them later snaps the impression back into place.
What if I limit the palette to a 10-color starter set
To picture a “I only have what’s in the official starter box” constraint, I ran the complex case with a 10-color palette: White / Black / Red / Blue / Yellow / Green / Light Bluish Gray / Dark Bluish Gray / Reddish Brown / Orange.
Color breakdown: Light Bluish Gray 831, Dark Bluish Gray 695, White 477, Reddish Brown 108, Black 93, Yellow 42, Red 35, Orange 19, Blue 4.
Green is the one color out of 10 that gets called zero times.
66% of the frame (1526/2304 pixels) is filled by the two grays, the skin disappears entirely, the hair becomes a flat Reddish Brown blob, and only the red scarf survives vividly as a chunk of Red.
It’s a visual reminder that you can’t build everything in LEGO — without at least “three skin-color bricks + a couple of beige tones + a few brown tones,” human-figure mosaics get rough.
How small can you go before the source disappears
So far everything has been at 48x48, but I was also curious about where the figure stops reading as a person at lower resolutions.
I ran the complex case through the same pipeline (OKLab + material penalty + despeckle) at 48 / 24 / 16 / 12 / 8.
The number of palette colors actually used also plateaus as resolution drops.
| Size | Pixels | Colors used |
|---|---|---|
| 48x48 | 2304 | 28 |
| 32x32 | 1024 | 26 |
| 24x24 | 576 | 22 |
| 16x16 | 256 | 19 |
| 12x12 | 144 | 15 |
| 8x8 | 64 | 14 |
Even at 16x16 we still use 19 colors out of 256 pixels, which means many colors get 16–52 pixel allocations and the rest get even fewer.
At ultra-low resolutions like 8x8, narrowing the palette probably matters more than the distance function — that’s a separate optimization axis.
My personal call on where the figure stops reading as a person:
- 48x48: You can see the face outline, hair flow, and scarf position
- 32x32: Face detail gets shaky, but if you know whose picture it is, it reads normally
- 24x24: Squint a bit from a distance and “yeah, that’s a person”
- 16x16: Without knowing the source, you wouldn’t catch that it’s a person; tell someone and they go “maybe?”
- 12x12 or smaller: “Sky on top, skin tone in the middle, red dot below” — block layout, not figure
Of course this judgment is from someone who already knows the source.
A brain that knows “this is Kana-chan” fills in missing information automatically, so the call above is probably 1–2 steps too forgiving.
As a real-world LEGO-build guideline: for “anyone can tell this is a person,” aim for 32x32 or more; for facial expression to survive, you want 48x48 or more.
Right per pixel, but noisy across the surface
After the color pick, BMBrick adds 4x4 block anchors and a despeckle pass to replace isolated pixels.
Even when a single pixel is correctly colored, an isolated 1-pixel dot floating away from its surroundings is noise at the mosaic level.
The same is true for pixel art.
The more accurately you pick colors per pixel, the more photo-derived speckle remains.
What humans want to see isn’t a faithful reproduction of every pixel — it’s whether the face, hair, eyes, and outlines read.
For LEGO mosaics, this matters even more: every 1x1 brick you place adds physical cost.
In this kind of conversion, fidelity and readability collide.
You want to preserve edges but remove random speckling.
You want skin gradients to look smooth but don’t want to mash the eyes and mouth.
BMBrick’s “block anchor + despeckle” is an honest, no-nonsense post-process for that compromise.
Where to look in a browser implementation
The original mentions it was built with vanilla JS, the Canvas API, and Web Workers.
With that setup, you can load a photo into the browser, downscale it on Canvas, walk the pixel array, and replace each pixel with a candidate.
The heavy part is distance computation for every pixel against every candidate, but for 48x48 or 64x64 mosaics that’s practical.
For example, 64x64 is 4096 pixels.
Even with 100 candidate colors, that’s only ~400,000 distance computations.
For many cases this doesn’t need Web Workers, but if you want to update a preview live as a slider moves, you’ll want to pull it off the main thread.
What matters in the implementation is data placement, not the algorithm name.
Converting RGB to OKLab on every pixel is wasteful — precompute OKLab values for the fixed palette and keep them ready.
Material penalties and inventory availability can live alongside that as candidate metadata.
You only need to convert the input pixel and sweep across the candidate array — the code stays simple.
In Building a toddler-friendly SVG coloring book, I avoided per-pixel region detection by using SVG paths as the fill regions directly.
LEGO mosaics are the opposite — per-pixel processing can’t be avoided.
That’s exactly why the distance function and post-processing design map directly to the look.
Before reaching for AI, look at your distance function
These days, when you want to convert a photo into a small picture, it’s tempting to reach for an AI style transfer first.
And in the pixel-art conversion article, Illustrious i2i + the pixel-art-xl LoRA did end up looking better than pure JS quantization.
But once “the result has to be buildable with real parts” becomes a constraint, as with LEGO mosaics, generative AI alone can’t satisfy that last constraint, and you come back to the unglamorous trio: perceptual distance, material weight, and local denoising.