A design memo for monitoring and resetting indie game booth play PCs from one screen
 Contents
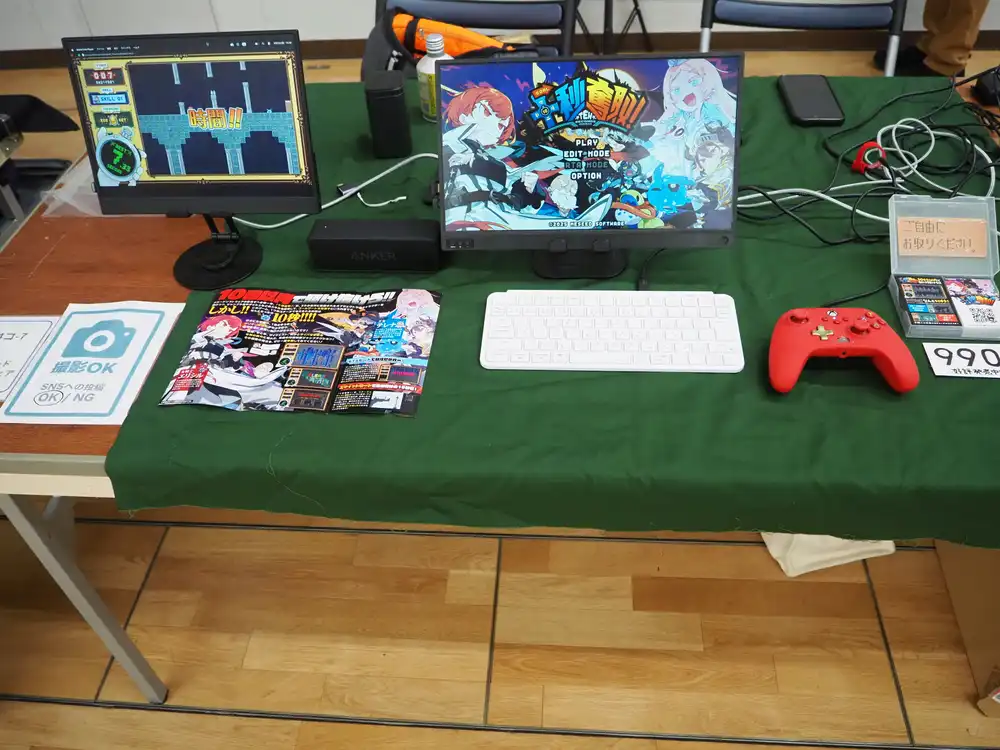
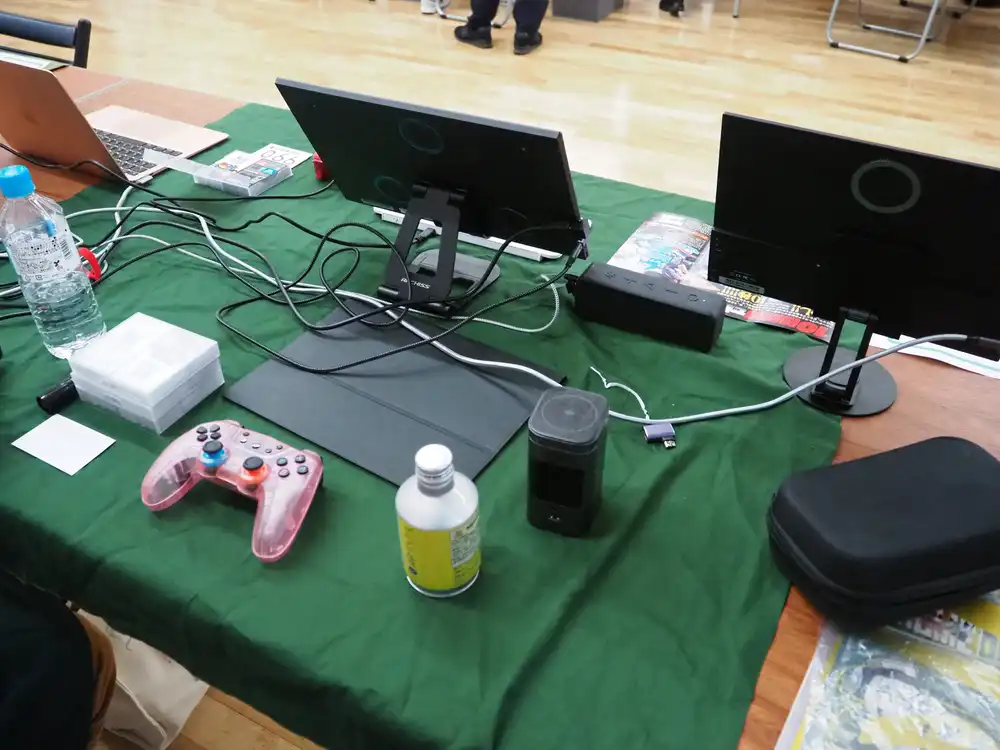
Yesterday I had a booth at an indie game showcase. The game was 10 Seconds Dash!, and the play stations were busy enough that I had to run home mid-event and bring more PCs.
Two things bugged me about running the booth, and while I’m not actually planning to build any of this right now, I want to lay out the idea on paper for next time. If I do build it, I’d start with the reset system and figure out the video monitoring after deciding the approach.
What was painful
The aisle in front of the booth was wide, so if I stood at the front the whole time my own trailer footage and gameplay screens got blocked from passersby behind me. Basically I should be standing on the exhibitor side, behind the booth.
But standing on the exhibitor side has two problems.
The first is PC initialization. The game keeps the save data on the title screen, so if I leave it the next visitor picks up where the previous one left off. Every time a play ends I have to walk around to the play side, kill the game, delete the save, restart the game.
Looking at this back-of-booth chaos, you really do want a way to reset without walking around there.
The second is screen visibility. From the exhibitor side I can’t see the play monitors well — wrong angle. I want to see where players get stuck and call out to them, and share the moment when someone clears the game.
So: from the exhibitor side, I want to remotely reset any play PC, and I want all the play screens visible at hand.
What I want
In list form.
- One screen on the exhibitor side that shows live video from every play PC
- Force-reset a single play station after the player leaves (kill process → delete save → restart game)
- If a PC itself goes wrong I’ll restart it manually, but it should rejoin the monitoring system automatically afterwards
- The venue’s LAN/Wi-Fi is off-limits. I’ll bring my own router and run a closed LAN
- The booth fits exactly one extra monitor, so video and status both have to live there
- Operations should run through a physical console anyone can touch without screwing things up (a relief operator from the circle takes shifts)
I can bring at most 3 play PCs myself, and a typical doujin show or even a game expo booth doesn’t have room for a 4th anyway. Three PCs is the design constraint for everything else.
Reset system
One central management server, one resident agent on each play PC. All operation goes through a physical console (Stream Deck) plugged into the server. Status is visible in two places: on the console’s per-key LCDs, and on a “management UI tile” inside the multiview monitor. Splitting display from operation like this means handover to a relief operator doesn’t need a verbal “the button on screen is here” briefing.
graph TD
    Router[My Wi-Fi router<br/>closed LAN]
    PiServer[Raspberry Pi 5<br/>management server + Companion<br/>+ Chromium kiosk]
    Console[Stream Deck<br/>operation + status<br/>USB]
    MV[Multiviewer<br/>4 in / 1 out]
    Monitor[Exhibitor monitor<br/>4-grid view]
    PC1[Play PC 1<br/>Windows + agent]
    PC2[Play PC 2<br/>Windows + agent]
    PC3[Play PC 3<br/>Windows + agent]

    Router --- PiServer
    Router --- PC1
    Router --- PC2
    Router --- PC3

    PiServer -- USB --> Console
    PiServer -- HDMI --> MV
    PC1 -- HDMI --> MV
    PC2 -- HDMI --> MV
    PC3 -- HDMI --> MV
    MV -- HDMI --> Monitor

    PiServer -.WS.-> PC1
    PiServer -.WS.-> PC2
    PiServer -.WS.-> PC3
Each play PC’s HDMI also has to drive its own play monitor, so in practice each PC has an HDMI splitter — one output to the multiviewer, one to the play monitor. Wiring details below.
A Raspberry Pi 5 is plenty for the server. Even with 10 play PCs it’d just be juggling WebSocket connections, no real CPU load. The wired LAN port keeps things stable when wired straight to the router (the play PCs would ideally also be wired, but realistic call depending on count and cable management).

Reset flow
Sequence from button press to game restart.
sequenceDiagram
    participant Me as Exhibitor
    participant Deck as Stream Deck
    participant Server as Management server<br/>(Pi + Companion)
    participant Agent as Agent<br/>(play PC)
    participant Game as Game
    participant UI as Management UI tile<br/>(Pi → multiviewer)

    Me->>Deck: Press PC1 reset key
    Deck->>Server: POST /reset {pc: "pc1"}
    Server->>Agent: WS: {cmd: "reset"}
    Agent->>Game: taskkill /f /im 10secondsdash.exe
    Agent->>Agent: delete save data directory
    Agent->>Game: restart game
    Agent->>Server: WS: {state: "running"}
    Server-->>Deck: update key color to "ready"
    Server-->>UI: update tile to "ready"
The management UI rides as one tile in multiview
Pi’s HDMI output drives Chromium kiosk full-screen with the management UI, and that HDMI goes into one of the multiviewer’s free inputs. Three play PCs + one Pi UI = 4 inputs, one per quadrant of the multiview.
The management UI only needs to show:
- One row per play PC (PC name, connection state, game state, time since last reset)
- No operation buttons on this side (the monitor isn’t meant to be touched)
- Big readable text, color coded: green = idle, yellow = playing, red = offline/error
Physical operation is Stream Deck only, monitor is video + at-a-glance status only — clear roles. For setup or troubleshooting where I need to interact with the management UI directly, I just hit the Pi’s IP from another device (phone or laptop in my pocket).
Play-PC-side agent
Resident script registered with Windows startup. Python or .NET both work, but PowerShell + a WebSocket library minimizes dependencies.
The minimum responsibilities:
- WebSocket-connect to the management server on launch
- Send a heartbeat every few seconds
- On
resetcommand:taskkill /f /im <game>.exeRemove-Itemthe save data folder- Restart the game executable
- Poll the game process and forward state to the server
I can’t detect “did it actually reach the title screen” after the restart, but if the process is up that’s good enough operationally. The clean version would be IPC inside the game so it can fire a “back at title” event, but that’s a question of whether you want to touch a released game’s code.
Auto-reconnect
After a PC restart it should behave like this.
- Agent launches via Windows startup at logon
- If the WebSocket is dropped, exponential backoff retry
- The server marks that PC offline; when it reconnects, it auto-flips back to online
To automate logon, the play-side Windows account is set to auto-login (netplwiz or the Autologon tool).
I do this on play PCs already, no extra cost.
Four sources onto one monitor
Three play PCs and one management UI = 4 sources to combine onto a single exhibitor monitor. Two routes: stream over the network, or aggregate the HDMI physically.
Considering NDI first
The natural first thought is NDI (Network Device Interface). I’m already running a closed LAN for the reset traffic, so layering video on top sounds clean.
If each PC runs OBS plus the DistroAV plugin (formerly obs-ndi — community project, not OBS-official or NDI-official, latest needs OBS 31+ and NDI 6 Runtime) outputting NDI, the receiving side’s NDI Studio Monitor can show all of them. Studio Monitor’s “Move to Quadrant” supports up to 4-way split, which is exactly what I need.
But NDI doesn’t fit this build well.
| Issue | Detail |
|---|---|
| Hard to put the management UI on NDI | NDI Studio Monitor only renders NDI streams. Tiling the Pi’s web UI alongside requires a separate PC running a browser — which violates the “no extra management PC” constraint |
| Load on the play PCs | OBS+DistroAV at 1080p60 full NDI is ~100–150 Mbps per machine. Gigabit LAN required, plus real CPU/GPU cost. Could affect game framerate |
| Fragility of discovery | mDNS-dependent, so I have to verify every time that my switches/routers don’t drop multicast or block via IGMP snooping |
NDI bumps into “don’t want to install anything on the play PCs”, “don’t want to spend a single percent of game performance”, and “don’t want to add equipment” all at once, so the answer for this build is physical HDMI aggregation.
HDMI aggregation: 4 inputs, 1 monitor
Each play PC’s HDMI goes into a splitter. One output to the play monitor, one output to the multiviewer. Plug the Pi 5’s HDMI (Chromium kiosk management UI) into the multiviewer’s spare input, and one of the four tiles becomes the management UI.
graph TD
    PC1[Play PC 1] --> S1[HDMI splitter]
    PC2[Play PC 2] --> S2[HDMI splitter]
    PC3[Play PC 3] --> S3[HDMI splitter]
    Pi[Raspberry Pi 5<br/>Chromium kiosk]

    S1 --> M1[Play monitor 1]
    S2 --> M2[Play monitor 2]
    S3 --> M3[Play monitor 3]

    S1 --> MV[Multiviewer<br/>4 in / 1 out]
    S2 --> MV
    S3 --> MV
    Pi --> MV

    MV --> EM[Exhibitor monitor<br/>4-grid view]
Zero software setup, no agent on the game side, latency is essentially zero, and if a feed dies you debug it by wiggling cables.

Going laptop kills the splitter need
A simpler variant: use 15-inch laptops as the play PCs. The laptop’s built-in display becomes the player’s screen, and HDMI out (set to mirror) goes straight to the multiviewer. No HDMI splitters, no external play monitors.
Laptop (built-in screen) ← player view
  └─ HDMI out (mirror) → multiviewer input
Three big wins.
- No HDMI splitters ×3 (~9,540 yen saved)
- No external play monitors to buy
- Cable count drops by half, faster setup and teardown
Two trade-offs.
- 15 inches is small versus a desktop with a big external monitor
- Procuring laptops with enough game performance is a separate cost (though usually doable with on-hand machines)
For doujin shows and similar booths where table space is precious, the laptop variant is often more realistic. For a fast-twitch game like 10 Seconds Dash, 15 inches doesn’t really hurt the experience.
Multiview gear: the two real choices
Two pieces of gear satisfy “show 4 inputs in one multiview HDMI output”.
| Gear | Multiview output | Streaming | Price |
|---|---|---|---|
| ELEVIEW EHD-707N (standalone multiviewer) | yes | no | ¥4,795 |
| ATEM Mini Pro (video switcher + multiview) | yes (10-view) | yes (RTMP/SRT + USB recording) | ¥48,029 |
It’s tempting to think “isn’t the plain ATEM Mini cheaper?” — that’s a trap. Plain ATEM Mini is a 4-in / 1-out switcher: it does not have multiview output (it picks one of four inputs and sends that one to its single output). Multiview is a Pro-and-up feature only. Going “ATEM is cheaper” with the plain model doesn’t even meet the requirement here.


Streaming is out of scope this round
If I dropped in an ATEM Mini Pro it’d cover both the multiview job and a live-streaming-to-Twitch/YouTube setup with one box. I considered that. After thinking it through, streaming is out of scope this time.
The reasoning.
- The booth doesn’t run gameplay continuously. Players actually playing is a smaller fraction than you’d think, and the rest of the time the play monitors just loop a trailer/PV. To stream, I’d need to design what goes out the live feed (the active PC during a play, the trailer during downtime, switching logic) — that’s a separate project from the reset system here
- It’s unclear whether you can just stream from doujin/indie events. Venue rules, neighboring booths’ preferences, attendee likeness/permission — this is a “ask the organizer” pile, not a unilateral call
- Game expos are different. Press- and streamer-friendly events are designed for on-booth video switching between booth shot and gameplay. At my current doujin-scale booth, that’s overkill
So this round: multiview gear is ELEVIEW. ATEM Mini Pro is the upgrade target whenever I do bring streaming into scope.
For 10 Seconds Dash specifically
10 Seconds Dash literally wraps a stage in ten seconds, so video real-time-ness matters. Hardware multiview has near-zero latency, so even during a 10-second play I can read the state from color and layout. A 3-second-interval screenshot approach would let an entire play fit in the gap between snapshots, which is why the lightweight “send screenshots” route is killed for this game.
The operation console: Stream Deck
I considered a tablet first, but once I assumed someone other than me is taking shifts at the booth, a physical console becomes the only sensible answer.
A tablet has too many failure modes.
- Mistapping the wrong tile and resetting the wrong PC
- Swiping the browser closed, switching tabs
- Notification banner pops up and gets tapped
- Screen lock kicks in and the relief operator doesn’t know how to unlock it
Physical buttons are “this key = this action”, fixed. Handover is “press here”. Only the console gets touched, the monitor is read-only — clean role split.
Why Stream Deck
- Each key has its own LCD that displays an arbitrary label/icon. “PC1 RESET” or “RESET ALL” appears directly on the physical button.
- The Pi can write any image to any key. When state changes, the Pi pushes “this key is currently playing, so render yellow + ‘playing’ text” or “this key is offline, so render red” via USB. The console doesn’t decide anything itself — it just receives presses and accepts pushed images. This is the standard pattern in Elgato’s official SDK and
python-elgato-streamdeck, with MK.2 specifically supported at the code level. - Bitfocus Companion runs on Linux/ARM64, so I can drive it from the Pi. Companion uses
python-elgato-streamdeckunder the hood, so even though Elgato itself isn’t officially Linux-supported, Companion-level usage is well-trodden.

The 15-key MK.2 fits a 3-PC setup with room to spare. “PC1–PC3 reset”, “reset all”, “page switch / status keys” all together still leaves more than half the keys empty. A 6-key Stream Deck Mini technically fits too, but the label area and key spacing are too tight if you want a relief operator not to mistap.
Falling back to MX Creative Console if I already own one
I happen to have a Logitech MX Creative Console too, so “skip Stream Deck and build with this” is on the table.
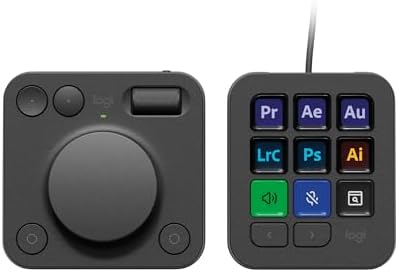
What this build needs is “the device emits a press event” and “the Pi can write a single image to any key”. The Keypad’s 9 keys are individual LCDs, so hardware-wise it’s possible.
That said, here’s the meaningful difference: Logi Options+ (the official software) has no facility for an external program to dynamically rewrite key images. Logi Options+ is a “configure profiles statically” tool.
What actually makes dynamic writes work is third-party OSS — Julusian/node-logitech-mx-creative-console (npm: @logitech-mx-creative-console/node) talks to the device over HID and pushes images, and Bitfocus Companion v4.1.0 (released 2025-09-16) consumes it via a separate surface plugin, bitfocus/companion-surface-logitech-mx-creative-console. Buttons only — the dial is not supported.
So “the feature exists” — but the foundation is reverse-engineered OSS. Compared with Stream Deck’s first-party Elgato SDK there’s a clear gap in stability and information.
With that in mind, the Pi+Companion comparison.
| Item | Stream Deck | MX Creative Console |
|---|---|---|
| Companion support | Long-standing, well-tested on Linux/Pi | Added in v4.1.0 (Sept 2025). New, working reports still thin, open issues remain |
| Linux/Pi control library | python-elgato-streamdeck, well-used | @logitech-mx-creative-console/node, community implementation. Buttons only, no dial |
| Official Linux support | None (community implementations are mature) | None. Logi Options+ is Win/Mac only |
| Searchable info when stuck | Plenty | Thin |
If I don’t want to risk it, just buy a Stream Deck. If I already own the MX Creative Console, the escape hatch is to run Companion on a Mac or Windows machine and have it hit the Pi’s HTTP endpoints over the network. Pi side stays clean, but you commit to dedicating one host PC for the console.
Wiring it with Bitfocus Companion
Stream Deck’s official software is Windows/Mac only, so to drive it from a Pi I route through Bitfocus Companion. Companion sees the Stream Deck and lets me bind each key to “HTTP GET/POST”, “send WebSocket”, “run a custom script”, etc.
Setup outline.
- Install the ARM64 Companion build on the Pi 5
- Plug the Stream Deck via USB
- Open Companion’s web UI in a browser (on the Pi or another machine)
- For each key, configure a “Generic HTTP” action and assign
POST http://localhost:3000/reset?pc=pc1 - Set the key label to “PC1 RESET”, set press color to yellow, etc.
- For state feedback, push variables into Companion’s internal API from the server side
Step 6 is the only fiddly bit. First pass can ship with press-only support, and feedback can be bolted on later.
How big a build is this anyway
| Component | Notes |
|---|---|
| Pi-side server | Express + ws library, fits in under 100 lines |
| Windows agent | PowerShell, ~150 lines. Mostly process polling and WebSocket reconnect |
| Status web UI | Vanilla JS or Astro, served statically. WebSocket subscription, full-screened in Chromium kiosk |
| Stream Deck config | HTTP actions per key in Bitfocus Companion. All GUI |
Risks once it’s actually running
| Risk | Mitigation |
|---|---|
| Router fails | Bring a spare router. A USB-powered small router can run from a power bank |
| Agent hangs | Server detects heartbeat loss and shows an alert. Last resort: Alt+F4 on the play PC’s keyboard |
| Pi itself fails | Design so play PCs work standalone during recovery. Agent doesn’t touch the game when disconnected |
The hard rule: server going down does not stop play. Management is for the operator’s convenience and shouldn’t drag the visitor’s play experience down with it.
Rough total (May 2026, Amazon JP)
Just so I have a number to commit against, here’s the all-bought-new estimate.
Equipment in the article
| Gear | Unit | Qty | Subtotal |
|---|---|---|---|
| Raspberry Pi 5 8GB | ¥16,800 | 1 | ¥16,800 |
| UGREEN HDMI splitter | ¥3,180 | 3 (per play PC) | ¥9,540 |
| ELEVIEW multiviewer | ¥4,795 | 1 | ¥4,795 |
| ATEM Mini Pro (alt to multiviewer) | ¥48,029 | 1 | ¥48,029 |
| Elgato Stream Deck MK.2 | ¥22,980 | 1 | ¥22,980 |
Adjacent stuff (not called out in the article, buy or scrounge)
| Gear | Ballpark |
|---|---|
| microSD 64GB (for Pi) | ~¥1,500 |
| Pi 5 official PSU | ~¥2,200 |
| Pi 5 case + heatsink | ~¥1,500 |
| HDMI cables ×6 (PC→splitter ×3, splitter→play monitor ×3, splitter→MV ×3, Pi→MV, MV→exhibitor monitor — mixed lengths) | ~¥3,600 |
| Wi-Fi router (small, for the closed LAN) | ~¥6,000 |
| Exhibitor monitor 15–22” | ¥15,000–25,000 |
| Subtotal (adjacent) | ~¥30,000–40,000 |
Totals by configuration
| Config | Breakdown | Total range |
|---|---|---|
| A. Stream Deck new + ELEVIEW (recommended) | ¥54,115 main + ¥30–40k adjacent | ¥84,000–94,000 |
| B. Existing MX Creative Console + ELEVIEW (cheapest) | ¥31,135 main + ¥30–40k adjacent | ¥61,000–71,000 |
| C. Future streaming phase (Stream Deck + ATEM Mini Pro) | ¥97,349 main + ¥30–40k adjacent | ¥127,000–137,000 |
C is what happens if I bring streaming into scope and swap ELEVIEW for ATEM Mini Pro — out of scope for this round.
Things you can drop.
| Target | Detail |
|---|---|
| Use laptops as play PCs | The 3 HDMI splitters (¥9,540) and 3 external play monitors disappear |
| Exhibitor monitor | Bring a spare from home → ¥0 |
| Wi-Fi router | Re-use a spare from home → ¥0 |
| HDMI cables | Halved if you already have some |
The aggressive build (laptops + existing MX Creative Console + ELEVIEW) lands in the 40k yen range. Realistic recommendation lands at ~¥90k. That’s the number I’d use to decide whether to actually build.
10 Seconds Dash! is also coming to Nintendo Switch — please pick it up.